Documentation to Support Usage Scenarios
To support the various managed usage scenarios, some use cases are provided as examples.
Although the use of services allows for implementations different from those specified, it is reminded that the supported functionalities are those described in the indicated Use Cases.
General Master Data
Default 'ditta' field in data transfer objects (DTO)
In POST requests to insert new records or documents, it is possible to specify the 'ditta' or 'dittaCg18' field.
A practical example: You want to insert a document with document type C-DDT for customer 1 and for company 1000.
Until version 202403000, The 'ditta' field had to be defined for each property of the body, so it was necessary to populate the 'ditta' or 'dittaCg18' field as shown in the JSON example below::
{
    "ditta": '1000',
    "valutaCg08": "EURO",
    "anagraficaDocumentoDitta": {
        "dittaCg18": '1000',
        "codDocumMg36": "C-DDT",
        "indStaperMg36": 1.0
    },
    "customerSupplierMG": {
        "dittaCg18": '1000',
        "tipocfCg40": 1,
        "cliFor": 1
    },
    "sezdoc": "00",
    "storageWH": {
        "dittaCg18": '1000',
        "codDep": "00"
    },
    "righe": [
        {
            "ditta": '1000',
            "progrRiga": 1.0,
            "codartMg66": "ART001",
            "descart": "Descrizione articolo",
            "qta1": 15.000
        }
    ]
}
From version 202501000 a default logic for the 'ditta' field in Data Transfer Objects (DTO) has been introduced, so if the value of the 'ditta' field of the "root" entity is not provided or is null, it is automatically populated with the company code retrieved from the current user session (parameter 'company'). This operation propagates to all associated 'external' and 'internal' entities.
Consequently, considering the example above, the user always has the same POST request.:
{{webapi_base_url}}/api/v1/{{scope}}/MG/Documento?company=1000
but in the body properties, it is no longer necessary to define the 'ditta' or 'dittaCg18' field, as shown in the JSON example below:
{
    "valutaCg08": "EURO",
    "anagraficaDocumentoDitta": {
        "codDocumMg36": "C-DDT",
        "indStaperMg36": 1.0
    },
    "customerSupplierMG": {
        "tipocfCg40": 1,
        "cliFor": 1
    },
    "sezdoc": "00",
    "storageWH": {
        "codDep": "00"
    },
    "righe": [
        {
            "progrRiga": 1.0,
            "codartMg66": "ART001",
            "descart": "Descrizione articolo",
            "qta1": 15.000
        }
    ]
}
Note: If the 'ditta' field is defined in a body property, it must be defined in all properties that make up the body.
Search for an Accounting Reason Code
To search for an accounting reason code, you must use a POST request. Here is an example:
{{webapi_base_url}}/api/v2/{{scope}}/CO/AccountingReasonCodeCO/search?company={{azienda}}&getTotalCount=true
{
    "filters": {
    "items": [
      {
        "operator": 0,
        "propertyName": "alias",
        "comparer": 0,
        "value": "FTV1"
      }
    ]
  },
  "pageSize": 0,
  "pageNumber": 0
}
Minimal Insertion of General Master Data
To insert a minimal general master record, you must use a POST request. Here is an example:
{{webapi_base_url}}/api/V2/{{scope}}/co/generalmasterdataco?company={{azienda}}
{
    "city": "Misano",
    "genderType": 0.0,
    "isEInvoicingEnabled": 0,
    "isExcludedFromBlacklist": 0.0,
    "isMasterDataForHomonymMerge": 0.0,
    "isNaturalPerson": 0.0,
    "isValidGeneralMasterData": 1.0,
    "legalName": "Anagrafica test WebApi ",
    "nationCode": 86.0,
    "taxCity": "Misano",
    "taxLegalName": "Anagrafica prova WebApi",
    "taxNationCode": 86.0

}
General Master Data Historical Entry
To perform the historicization of a General Master Data record, you need to use the GeneralMasterDataHistoryCO/historicize endpoint. Below is an example of how to use it:
{{webapi_base_url}}/api/v1/{{scope}}/CO/GeneralMasterDataHistoryCO/historicize?company={{azienda}}
{
    {
    "generalMasterDataCode": 1,
    "validityEndDate": "2026-08-09",
    "addDescription": "Historicization via webapi6"
}

}
The following response will be returned:
{
   {
    "cg16Codice": 1,
    "datacre": "2026-08-06T14:57:09.877",
    "datafineval": "2026-08-09T00:00:00",
    "flgFromTp": 0,
    "id": 129,
    "note": "Historicization via webapi6",
    "xmlData": "<Anagrafica xmlns:xsi=\"http://www.w3.org/2001/XMLSchema-instance\"><CG16_CODICE>1</CG16_CODICE><CG16_RAGSOANAG>Test E2E 20:12:37</CG16_RAGSOANAG><CG16_INDIRIZZO>Via Roma, 26</CG16_INDIRIZZO><CG16_RAGSOANAGEX xsi:nil=\"true\" /><CG16_ALIAS xsi:nil=\"true\" /><CG16_COMANA_CG01>G479</CG16_COMANA_CG01><CG16_CAP>47900     </CG16_CAP><CG16_CODICEIDENT xsi:nil=\"true\" /><CG16_CITTA>RIMINI</CG16_CITTA><CG16_PROV xsi:nil=\"true\" /><CG16_CODICE_CG07>86</CG16_CODICE_CG07><CG16_PARTIVA>12345678919 </CG16_PARTIVA><CG16_FLGPRSFIS>0</CG16_FLGPRSFIS><CG16_RAGSOFISC>Anagrafica 1</CG16_RAGSOFISC><CG16_INDFISCALE>Via Roma, 26</CG16_INDFISCALE><CG16_COMFIS_CG01>G479</CG16_COMFIS_CG01><CG16_CAPFISC>47900     </CG16_CAPFISC><CG16_CITTAFISC>RIMINI</CG16_CITTAFISC><CG16_RAGSOFISCEX xsi:nil=\"true\" /><CG16_PROVFISC xsi:nil=\"true\" /><CG16_COGNOME xsi:nil=\"true\" />",
    "extensionData": [],
    "additionalData": {},
    "pluginData": {}
}

}
Minimal Insertion of a Customer/Supplier
To insert a customer or supplier, it is necessary to have previously inserted the common master data and, when inserting a customer, indicate the corresponding common master data code, as shown in the example below:
{{webapi_base_url}}/api/v2/{{scope}}/co/CustomerSupplierCO?company={{azienda}}
{
    "customerSupplierType": 0,
    "generalMasterDataCode": 980,
    "paymentTermCode": "201",
    "blackListGeneralMasterDataCode": 4,
    "csAccountingIndexCode": "CATF",
    "currencyCode": "EURO",
    "AgenteCode" : "Agente",
    "OfficeCode": 1,
    "VatCode": 22,
    "additionalInformation": {
        "macroAreaCode": "UE",
        "areaCode": "ITA",
        "zoneCode": null,

        "macrocategoryCode": "MCQ",
        "categoryCode": "CA1",
        "subCategory": "SC1"
    }
}
Search for a Customer/Supplier by Tax Code and/or VAT Number
Using the call
{{webapi_base_url}}/api/v1/{{scope}}/CO/lookup/CustomerSupplierCO?metadata=true&company={{defaultCompany}}&_op=search
it is possible to search for a customer by VAT Number or Tax Code or by Company Name.
{
    "filters":
    {
        "items":
        [
            {
                "comparer": 0,
                "propertyName": "CustomerSupplierCO_Tipocf",
                "value": "0"
            },
            {
                "operator": 1,
                "items":
                [
                    {
                        "propertyName": "CustomerSupplierCO_GeneralMasterDataCO_Partiva",
                        "comparer": 0,
                        "value": "25052733463"
                    },
                    {
                        "operator": 2,
                        "propertyName": "CustomerSupplierCO_GeneralMasterDataCO_Codfiscale",
                        "comparer": 30,
                        "value": "MRARSS13S08H501H"
                    },
                    {
                        "operator": 2,
                        "propertyName": "CustomerSupplierCO_GeneralMasterDataCO_RagSoAnag",
                        "comparer": 20,
                        "value": "ROSSI"
                    }
                ]
            }
        ]
    },
    "pageSize": 5,
    "pageNumber": 0
}
Insert of a CIG and CUP code
To insert a cig and cup code, it is necessary to execute a POST request, as shown in the example below:
{{webapi_base_url}}/api/v1/{{scope}}/CO/CIGCUPMasterDataCO?company={{defaultCompany}}
{
{
  "cig": "12605763",
  "cup": "1202806",
  "indTipodocrif": 0
}
}
This is the response:
{
{
    "cig": "12605763",
    "cup": "1202806",
    "descrizione": null,
    "docrifData": null,
    "docrifId": null,
    "flgAttivo": 0.0,
    "id": 33,
    "indTipocontr": 0,
    "indTipodocrif": 0,
    "rowversion": "AAAAAABfNus=",
    "extensionData": [],
    "additionalData": {},
    "pluginData": {}
}
}
Associate a CIG and CUP Code to a Customer
To associate a new CIG and CUP code to a customer, send a POST request as shown in the example below, specifying the id of the CIG/CUP code within the appropriate entity. In the following example, idcigcupCo1h è id 33 for customer code 2100 - idclifro 13440
{{webapi_base_url}}/api/v1/{{scope}}/CO/CustomerSupplierCO/13440/CustomerSupplierCIGCUPCO?company={{defaultCompany}}
{
{
    "cliforCg44": 2100.0,
    "dittaCg18": 2.0,
    "idcigcupCo1h": 33,
    "tipocfCg44": 0.0,
    "cigcuPcode": {
        "cig": "12605763",
        "cup": "1202806",
        "flgAttivo": 1.0,
        "id": 33,
        "indTipocontr": 0,
        "indTipodocrif": 0
    }
}
}
This is the response :
{
{
    "cliforCg44": 2100.0,
    "dittaCg18": 2.0,
    "id": 32,
    "idcigcupCo1h": 33,
    "progREf08": null,
    "progRMg35": null,
    "rowversion": "AAAAAABfNu0=",
    "tipocfCg44": 0.0,
    "cigcuPcode": {
        "cig": "12605763",
        "cup": "1202806",
        "descrizione": "CIG CUP WebApi",
        "docrifData": null,
        "docrifId": null,
        "flgAttivo": 1.0,
        "id": 33,
        "indTipocontr": 0,
        "indTipodocrif": 0,
        "rowversion": "AAAAAABfNuw=",
        "extensionData": [],
        "additionalData": {},
        "pluginData": {}
    },
}
}
Agent Master Data Entry
To insert a new agent, you must use a POST request. Here is an example:
{{webapi_base_url}}/api/v2/{{scope}}/co/AgentCO?company={{azienda}}
{
    "code": "008",
    "companyCode": 2.0,
    "generalMasterDataCode": 2593,
    "extensionData": [],
    "additionalData": {},
    "pluginData": {}
}
Create a Country
To insert a new country, you must use a POST request. Here is an example:
{{webapi_base_url}}/api/v2/{{scope}}/co/NationCO?company={{azienda}}
{

    "code": 811.0,
    "currencyCode": "EURO",
    "description": "Nazione Italia Webapi",
    "euEntryDate": "1995-01-01T00:00:00",
    "ibanLength": 27,
    "isIbanUsed": 1,
    "iso3166Alpha2": "IT",
    "iso3166Alpha3": "ITA",
    "iso3166Description": "ITALY",
    "iso3166Number": "380",
    "isoCode": "IT",
    "isSepaStandardUsed": 1,
    "nationType": 1.0,
    "sianCode": null,
    "vatNumberLength": "11"
}
Minimal Insertion of an Item Code
Through the POST call
{{webapi_base_url}}/api/v2/{{scope}}/WH/ItemWH?company={{defaultCompany}}
it is possible to insert a new item code.
Below is an example of inserting an item code with the minimum data:
{ {
    "code": "{{ItemCode}}",
    "companyCode": {{defaultCompany}},
    "description": "Test webapi  articolo",
    "itemStatusCode": 50,
    "vatCode": "22",
    "createDate": "2024-05-08T00:00:00",
    "updateDate": "2025-10-06T00:00:00",
    "barcodes": [],
    "currentStatus": {
        "statoCorrente": {
            "idStato": 4,
            "seq": -1,
            "indTipoStato": 0
        }
    },
    "descriptions": [
        {
            "companyCode": 1000.0,
            "description": "Test webapi articolo"
        }
    ],
    "intrastatData": null,
    "packagings": [
        {
            "capacity": 0.0,
            "companyCode": 1000.0,
            "packagingCode": "CD",
            "packagingPieces": 1.000,
        }
    ],
    "stocks": [
        {
            "companyCode": 1000.0,
            "coverIndex": 0.000,
            "isAutosaveStocksQuantity": 1,
            "maxStock": 100.000,
            "minStock": 10.000,
            "storageCode": "00",
        }
    ]
}
}
Editing an item with an item code containing the special character "/"
It is possible to edit an item with an item code containing the special character "/" using only the V2 of the webapi.
Example of item edit:
PUT {{webapi_base_url}}/api/v2/{{scope}}/WH/ItemWH?company={{defaultCompany}}
{
    "abcProductionValueCode": null,
    "abcPurchaseValueCode": null,
    "abcSalesValueCode": null,
    "abcSurplusValueCode": null,
    "article62GoodsType": 0,
    "bomHeredityType": 0,
    "brandCode": null,
    "code": "ARTICOLOV/7",
    "commissionPercentage": null,
    "commissionRegimeType": 0.0,
    "commissionsChartCode": null,
    "commissionsColumnLine": null,
    "companyCode": 2.0,
    "conversionFactor": null,
    "conversionFactorType": 0,
    "createDate": "2025-10-06T00:00:00",
    "decimalNumbersQuantitiesType": 2,
    "description": "Test webapi articolo",
    "disposalDate": null,
    "familyCode": null,
}
In the base URL of the PUT ItemWH call, it is not necessary to specify the item code: it is sufficient to populate the Code field in the request body, as shown in the example below (the body shown is purely illustrative).
Reading service for Item Barcode
The article barcode reading service allows you to read the barcodes of all articles. For example
POST {{webapi_base_url}}/api/v2/{{scope}}/WH/ItemBarCodeWH/search?company={{defaultCompany}}
This is the body of Search service:
{
    "filters": {
        "operator": 0,
        "items": [
            {
                "operator": 0,
                "propertyName": "itemcode",
                "comparer": 0,
                "value": "ARTICOLO3"
            }
        ]
    },
    "pageSize": 0,
    "pageNumber": 0
}
This is the response:
{
   "totalCount": 0,
    "pageSize": 1,
    "pageNumber": 0,
    "data": [
        {
            "barcode": "0000000000079",
            "barcodeType": 0.0,
            "companyCode": 1000.0,
            "hyperMediaId": null,
            "isCheckdigitCalculation": 1.0,
            "isPrintLabels": 1.0,
            "isSendToCashRegisters": 1.0,
            "itemCode": "ARTICOLO3",
            "itemVariantCode": "",
            "managementType": 0.0,
            "originType": 1.0,
            "piecesPerPackaging": 1.000,
            "extensionData": [],
            "additionalData": {},
            "pluginData": {}
        }
    ],
    "extensionData": [],
    "additionalData": {},
    "pluginData": {}
}
Reading and Searching ItemStatusWH
The ItemStatusWH service allows you to read and search for standard item statuses. For example
{{webapi_base_url}}/api/v1/{{scope}}/WH/ItemStatusWH/search?company={{defaultCompany}}
This is the body of Search service:
{
    "filters": {
        "items": [

            {
                "operator": 1,
                "propertyName": "indStato",
                "comparer": 0,
                "value": 10
            }
        ]
    },
    "pageSize": 0,
    "pageNumber": 0
}
This is the response:
{
    "totalCount": 0,
    "pageSize": 1,
    "pageNumber": 0,
    "data": [
        {
            "descr": "In progettazione",
            "indStato": 10.0,
            "extensionData": [],
            "additionalData": {},
            "pluginData": {}
        }
    ],
    "extensionData": [],
    "additionalData": {},
    "pluginData": {}
}
Management of parametric states on customers-suppliers, items and documents
The StateManagementService service allows user to view the Current State of an object, based on the identifying guid, and allows user to change the current state to one of its available states.
The Current State is managed for the following entities:
- CustomerSupplierMG (GET only)
- CustomerSupplierCO
- DocumentoCorpoMG
- DocumentoTestataMG
- ItemWH
User can view and/or modify the Current State of an object if a predefined Flow has been defined for the entity in question and based on the permissions related to the user being used.
Through a simple GET call, user can view the Current State and the Available States for a specific user in the response. For example, if user wants to check the current state of the item code SW6 for the admin user, the GET call should be structured as follows:
GET {{webapi_base_url}}/api/v1/{{scope}}/WH/ItemWH/SW6?company={{defaultCompany}}&user=admin
and the response will show the state of the item code under consideration and the available states for the admin user.
    "statoAttualeCO": {
        "statoCorrente": {
            "idStato": 4,
            "seq": -1,
            "indTipoStato": 0,
            "extensionData": [],
            "additionalData": {}
        },
        "statiDisponibili": [
            {
                "idStato": 3,
                "seq": 3,
                "indTipoStato": 0,
                "extensionData": [],
                "additionalData": {}
            },
            {
                "idStato": 4,
                "seq": 4,
                "indTipoStato": 0,
                "extensionData": [],
                "additionalData": {}
            },
            {
                "idStato": 5,
                "seq": 5,
                "indTipoStato": 0,
                "extensionData": [],
                "additionalData": {}
            },
            {
                "idStato": 6,
                "seq": 6,
                "indTipoStato": 0,
                "extensionData": [],
                "additionalData": {}
            }
    }
If user runs the same GET call but specifies another user (who does not have the same permissions as the 'admin' user mentioned above), the response will always show the same Current State but will only show the available states for the other user.
Through the PUT or PATCH call, user can modify the value of the Current State of the entity under consideration, so for example, considering the item code SW6, the PATCH call should be structured as follows:
PATCH {{webapi_base_url}}/api/v1/{{scope}}/WH/ItemWH/SW6?company={{defaultCompany}}&user=admin
and in the body, user must indicate a new stateId among those available:
{
    "statoAttualeCO": {
        "statoCorrente": {
            "idStato": 5,
            "seq":5,
            "indTipoStato": 0,
            "extensionData": [],
            "additionalData": {}
        }
    }
}
Through the StateManagementService service and through the related GUID, it is possible to view the currentState (which corresponds to the CurrentState) existing for the object under consideration, and as well as the availableStates (which corresponds to the list of available States). For example, always considering the item code 'SW6' for the admin user, a GET call is made, specifying the corresponding GUID of the aforementioned item code:
GET {{webapi_base_url}}/api/v1/{{scope}}/CO/StateManagementService/{000-000-000-000}?company={{defaultCompany}}&user=admin
And the response will be as follows:
{
    "currentState": {
        "idStato": 4,
        "description": "In uso",
        "seq": -1,
        "indTipoStato": 0,
        "extensionData": [],
        "additionalData": {}
    },
    "availableStates": [
        {
            "idStato": 3,
            "description": "Rilasciato",
            "seq": 3,
            "indTipoStato": 0,
            "extensionData": [],
            "additionalData": {}
        },
        {
            "idStato": 4,
            "description": "In uso",
            "seq": 4,
            "indTipoStato": 0,
            "extensionData": [],
            "additionalData": {}
        },
        {
            "idStato": 5,
            "description": "In esaurimento",
            "seq": 5,
            "indTipoStato": 0,
            "extensionData": [],
            "additionalData": {}
        },
        {
            "idStato": 6,
            "description": "Dismesso",
            "seq": 6,
            "indTipoStato": 0,
            "extensionData": [],
            "additionalData": {}
        }
    ]
}
Or
For example, if you want to check the CurrentState of a document, you make a GET call (as shown), specifying the corresponding GUID of the DocumentHeader:
GET {{webapi_base_url}}/api/v1/{{scope}}/CO/StateManagementService/{{guidTestataDocumento}}?company={{defaultCompany}}&user=admin
And the response will show the CurrentState (or currentState) of the document and any AvailableStates (or availableStates), so it will be as follows:
{
    "currentState": {
        "idStato": 41,
        "description": "Confermato",
        "seq": -1,
        "indTipoStato": 0,
        "extensionData": [],
        "additionalData": {}
    },
    "availableStates": [
        {
            "idStato": 40,
            "description": "Acquisito",
            "seq": 1,
            "indTipoStato": 0,
            "extensionData": [],
            "additionalData": {}
        },
        {
            "idStato": 41,
            "description": "Confermato",
            "seq": 2,
            "indTipoStato": 0,
            "extensionData": [],
            "additionalData": {}
        },
        {
            "idStato": 42,
            "description": "Bloccato",
            "seq": 3,
            "indTipoStato": 0,
            "extensionData": [],
            "additionalData": {}
        },
        {
            "idStato": 43,
            "description": "In spedizione",
            "seq": 4,
            "indTipoStato": 0,
            "extensionData": [],
            "additionalData": {}
        },
        {
            "idStato": 44,
            "description": "Evaso",
            "seq": 5,
            "indTipoStato": 0,
            "extensionData": [],
            "additionalData": {}
        }
    ]
}
Or if you want to check the CurrentState of a row within the document under consideration, with a simple GET on the document, you retrieve the corresponding GUID identifying the said row and then execute the following GET call for the StateManagementCO service:
GET {{webapi_base_url}}/api/v1/{{scope}}/CO/StateManagementService/{{guidRigaDocumento}}?company={{defaultCompany}}&user=admin
And the response will show the CurrentState (or currentState) of the document row and any AvailableStates (or availableStates), so it will be as follows:
{
    "currentState": {
        "idStato": 46,
        "description": "In evasione",
        "seq": -1,
        "indTipoStato": 0,
        "extensionData": [],
        "additionalData": {}
    },
    "availableStates": [
        {
            "idStato": 45,
            "description": "Da evadere",
            "seq": 1,
            "indTipoStato": 0,
            "extensionData": [],
            "additionalData": {}
        },
        {
            "idStato": 46,
            "description": "In evasione",
            "seq": 2,
            "indTipoStato": 0,
            "extensionData": [],
            "additionalData": {}
        },
        {
            "idStato": 47,
            "description": "Evasa",
            "seq": 3,
            "indTipoStato": 0,
            "extensionData": [],
            "additionalData": {}
        },
        {
            "idStato": 48,
            "description": "Bloccata",
            "seq": 4,
            "indTipoStato": 0,
            "extensionData": [],
            "additionalData": {}
        },
        {
            "idStato": 49,
            "description": "Annullata",
            "seq": 5,
            "indTipoStato": 0,
            "extensionData": [],
            "additionalData": {}
        }
    ]
}
Through the StateManagementService and the setstate action, it is also possible to advance the existing 'currentState' for an object, always using the relevant GUID, by specifying a new 'idState' from those available for the user being used. In this case, the following POST call is executed:
POST {{webapi_base_url}}/api/v1/{{scope}}/CO/StateManagementService/setstate?company={{defaultCompany}}&user=admin
and in the body, you specify the GUID of the object in question and the new idState, specifying it in the "newState" field:
{
  "guidObject": "{000-000-000-000}",
  "newState": 5,
  "entityCodeForDefault": null
}
For example, considering a specific customer in the 'Codified' state (idState=7), after the appropriate administrative checks, you want to advance the customer's state from 'Codified' to 'In Use' (idState=8). To do this, you execute the POST call, specifying the customer's GUID in the body:
POST {{webapi_base_url}}/api/v1/{{scope}}/CO/StateManagementService/setstate?company={{defaultCompany}}&user=admin
And in the body, you specify the GUID of the object in question (in this case, the Customer) and the new idState, specifying it in the "newState" field:
{
  "guidObject": "{{guidCliente}}",
  "newState": 8,
  "entityCodeForDefault": null
}
User can also verify the case where a predefined Flow has not been specified, so when creating an item code, for example, the code 'AW1', the CurrentStateCO is NULL. Later, from the Interface, user indicates a flow as 'Default' for the Items entity. At this point, through the 'setstate' action, user can set the value of the 'Default' state belonging to the corresponding 'Default Flow' for the Items entity.
So user runs the same POST call, setting the "newState" parameter to null and "entityCodeForDefault": 6, specifying the guid of the object under consideration (therefore the guid of the item code under consideration AW1)
{
  "guidObject": "{000-000-000-000}",
  "newState": null,
  "entityCodeForDefault": 6
}
The response will show the currentState and the availableStates, as shown below:
{
    "currentState": {
        "idStato": 10002,
        "description": "item inserted",
        "seq": -1,
        "indTipoStato": 0,
        "extensionData": [],
        "additionalData": {}
    },
    "availableStates": [
        {
            "idStato": 10002,
            "description": "item inserted",
            "seq": 1,
            "indTipoStato": 0,
            "extensionData": [],
            "additionalData": {}
        },
        {
            "idStato": 10003,
            "description": "item confirmed",
            "seq": 2,
            "indTipoStato": 0,
            "extensionData": [],
            "additionalData": {}
        }
    ]
}
Through the StateManagementService and the history action, user can also view the various state advancements of the object under consideration, always through the corresponding guid. User performs a GET call structured as follows:
GET {{webapi_base_url}}/api/v1/{{scope}}/CO/StateManagementService/history/{000-000-000-000}?company={{defaultCompany}}&user=admin
and the response will show the "currentState" and the "statusOperationHistory" with various information:
{
    "currentState": {
        "idStato": 10003,
        "description": "item confirmed",
        "seq": -1,
        "indTipoStato": 0,
        "extensionData": [],
        "additionalData": {}
    },
    "statusOperationHistory": [
        {
            "idHistory": 135,
            "idStatus": 10002,
            "validityDate": "2025-03-10T00:00:00",
            "updateDate": "2025-03-10T15:00:54.713",
            "historyAuto": 0,
            "statusDescription": "item inserted",
            "flowDescription": "Test Flow",
            "userDescription": "Admin user",
            "historyDelete": 1
        },
        {
            "idHistory": 136,
            "idStatus": 10003,
            "validityDate": "2025-03-21T00:00:00",
            "updateDate": "2025-03-21T15:03:39.033",
            "historyAuto": 0,
            "statusDescription": "item confirmed",
            "flowDescription": "Test Flow",
            "userDescription": "Admin user",
            "historyDelete": 0
        }
    ],
}
Inserting a Brand to Associate with an Item
Through the new BrandWH service, you can create/insert a Brand that can later be associated with an item. To insert a new Brand, you need to use a POST request. Here’s an example:
POST {{webapi_base_url}}/api/v1/{{scope}}/WH/BrandWH?company={{defaultCompany}}&user=admin
With the following minimal body:
{
  "codMarca": "{{codMarca}}",
  "descrmarca": "Marca di test"

}
The response will be:
{
    "codMarca": "NikeTest",
    "descrmarca": "Marca di test",
    "dittaCg18": 1000.0,
    "idmediaCg99": null,
    "idprov": 8,
    "extensionData": [],
    "additionalData": {},
    "pluginData": {}
}
BatchInventoryService for Batch Inventory Inquiry
The BatchInventoryService, with its corresponding batchinventory action, allows you to perform a batch inventory inquiry for warehouse items managed by lot, replicating the behavior of the "Batch Inventory Inquiry and Print" procedure from the interface.
The input parameters also support filtering, sorting, and pagination conditions.
For example, to check the inventory status of the item code LOT_KIT (which is lot-managed) in the main warehouse, considering the "Progressives to be processed" equal to the "Real-time" parameter, the following POST request is made:
{{webapi_base_url}}/api/v1/{{scope}}/WH/BatchInventoryService/batchinventory?company={{defaultCompany}}&user=admin
In the request body, under the searchParameters parameter, the item code LOT_KIT and the main warehouse code "00" are defined as shown below:
{
    "entriesCombination": 1,
    "progressiveType": 1,
    "searchParameters": {
        "filterProperties": [
            {
                "propertyName": "ItemCode",
                "fromValue": "LOT_KIT",
                "toValue": "LOT_KIT"
            },
            {
                "propertyName": "StorageCode",
                "fromValue": "00",
                "toValue": "00"
            }
        ],
        "pageSize": 0,
        "pageNumber": 0
    }
}
The response returns inventory values by item code and lot code. In our example, the rows section is populated with all the lot codes involved (shown under the lotCode parameter) for the item code LOT_KIT, as illustrated below:
{
    "totalRowsFound": 2,
    "totalRowsShowed": 2,
    "pageNumber": 0,
    "rows": [
        {
            "itemCode": "LOT_KIT                  ",
            "itemVariantCode": "                    ",
            "itemDescription": "articolo che gestisce i lotti",
            "storageCode": "00",
            "lotCode": "L1                       ",
            "lotDescription": "lotto1",
            "dueDate": null,
            "serialNumber": null,
            "palletsCode": null,
            "projectCode": null,
            "locationCode": null,
            "packagingCode": null,
            "materialsDyeingCode": null,
            "referenceNodeCode": null,
            "totalLoadQuantity1": 24.000,
            "totalUnloadQuantity1": 9.000,
            "totalLoadQuantity2": 0.000,
            "totalUnloadQuantity2": 0.000,
            "initialStockQuantity1": 0.000,
            "currentStockQuantity1": 15.000,
            "actualStockQuantity1": 15.000,
            "fiscalStockQuantity1": 15.000,
            "prodCommQuantity1": 0.000,
            "initialStockQuantity2": 0.000,
            "currentStockQuantity2": 0.000,
            "actualStockQuantity2": 0.000,
            "fiscalStockQuantity2": 0.000,
            "prodCommQuantity2": 0.000,
            "freeUnload2Quantity2": 0.000,
            "averageCostQuantity1": 546.670000,
            "lastCost": 310.000000
        },
        {
            "itemCode": "LOT_KIT                  ",
            "itemVariantCode": "                    ",
            "itemDescription": "articolo che gestisce i lotti",
            "storageCode": "00",
            "lotCode": "L2                       ",
            "lotDescription": "lotto2",
            "dueDate": null,
            "serialNumber": null,
            "palletsCode": null,
            "projectCode": null,
            "locationCode": null,
            "packagingCode": null,
            "materialsDyeingCode": null,
            "referenceNodeCode": null,
            "totalLoadQuantity1": 16.000,
            "totalUnloadQuantity1": 6.000,
            "totalLoadQuantity2": 0.000,
            "totalUnloadQuantity2": 0.000,
            "initialStockQuantity1": 0.000,
            "currentStockQuantity1": 10.000,
            "actualStockQuantity1": 10.000,
            "fiscalStockQuantity1": 10.000,
            "prodCommQuantity1": 0.000,
            "initialStockQuantity2": 0.000,
            "currentStockQuantity2": 0.000,
            "actualStockQuantity2": 0.000,
            "fiscalStockQuantity2": 0.000,
            "prodCommQuantity2": 0.000,
            "freeUnload2Quantity2": 0.000,
            "averageCostQuantity1": 546.670000,
            "lastCost": 310.000000
        },
    ]
}
NOTE: If ProgressiveType = 2 is specified, the year parameter becomes mandatory.
Documents
Document insertion with minimal data
The "Document" resource can be used to insert/delete/modify a document in TSE. The resource can be used to insert any type of document, simply by changing the document code in the call.
In order for the information sent to the WebAPI via the corresponding DTO to be correctly received and stored, it is essential that the document code wizard used also handles it properly on the user interface.
Therefore, during the solution design phase, it is necessary to always perform a double check: verify that a document manually entered through the user interface, with the same information sent via WebAPI, is correctly registered and managed by the system.
The insertion of a document can occur synchronously with the POST method.
Please note that to insert a document, it is not necessary to populate all the properties of the complex DTO that represents it. Here is an example of a minimal document insertion with the essential header information and a line of type “item,” including item code and quantity.
Post {{webapi_base_url}}/api/v2/{{scope}}/MG/DocumentMG?company={{defaultCompany}}
with the body:
{
 {
    "callOptions": {
        "forceStampExpensesToZero": false,
        "forceCollectionExpensesToZero": false,
        "lockInsertExistingDocument": false,
        "excludeLoadingMultipleAgents": true,
        "excludeHeaderVat": false,
        "disableLetterOfIntent": true,
        "excludeCSExpensesFixedTexts": false,
        "disableExistingItemCheck": false
    },
    "companyCode": 1000,
    "currencyCode": "EURO",
    "customerSupplierCode": 1.0,
    "customerSupplierType": 0.0,
    "documentCode": "CLI-ORDINE",
    "documentDate": "2025-10-15T00:00:00",
    "documentSubtype": 1.0,
    "documentType": 21.0,
    "documentTypeNumbering": 39.0,
    "registrationDate": "2025-10-15T00:00:00",
    "storageCode": "00",
    "vatCode": "317",
    "sectionalCode": "00",
    "officeCode": "YYY",
    "agents": [],
    "rows": [
        {
            "callOptions": {
                "forcePriceDiscount": false
            },
            "companyCode": 1000,
            "description": "Descrizione articolo",
            "itemCode": "ART001",
            "qty1": 1.000,
            "qty2": null,
            "rowProgressive": 2.0,
            "rowType": 0
        }
    ],
    "extensionData": [],
    "additionalData": {},
    "pluginData": {}
}
}
Some Notes/Comparisons on Version V2
"ditta" or "dittaCg18" (the company working code): Renamed to companyCode property in DocumentHeaderV2MG.
"companyDocumentMasterData": This property has been removed and is now handled through the "documentCode" field. By setting this field, the system automatically recognizes whether the document code is standard or customized.
"customerSupplierMG": The property of type customerSupplierMGDTO has been removed. The customer or supplier to whom the document is assigned is now managed through the fields customerSupplierCode and customerSupplierType. For example, to assign the document to the customer with code 123, you need to set: "customerSupplierCode": 123 and "customerSupplierType": 0.0.
{
  "customerSupplierCode": 123,
  "customerSupplierType": 0.0,
}
Please note that customerSupplierCode refers to the customer code (or the supplier code for supplier-type documents) and not the ID stored in the CG44_CLIFOR table. Finally, remember that if the document code requires a customer or supplier, you must define the customerSupplierType indicator with the possible values from the CG44_TIPOCF field of the CG44_CLIFOR table, which are:
0 for customers 1 for suppliers
"sectionalCode": the section of the document numbering (e.g., "sezdoc": "00")
"storageCode": the "storageCode" field represents the warehouse to be moved. For example, working on company 100, to order goods in warehouse "00", it is necessary to set the storageWH property as follows:
{
     "storageCode": "00",
}
"rows": the array of rows to be inserted into the document; it is an array of objects of type DocumentRowV2MGDTO. The types of rows currently supported in the document body are as follows:
- Item (rowType = 0)
- Manual Item (rowType = 1)
- Descriptive (rowType = 2)
- Expense (rowType = 4)
- Fixed Text (rowType = 6)
- Node (rowType = 15)
- Activity (rowType = 16)
- Project Expense (rowType = 17)
Other types usable from the direct document issuance interface are not supported.
Depending on the type of line to be inserted in the document, a different "rowType" must be specified, as described above. For each document line, at least the line number, code, and quantity must be indicated.
- For item lines, at least the line number, item code, item description, and quantity must be indicated. The rowType property takes the default value of 0 if not set.
{
    "rowProgressive": 1.0,
    "itemCode": "ART001",
    "description": "Descrizione articolo ART001",
    "qty1": 1.000
}
Note: If item lines are inserted and an item code provides for the automatic explosion of additional lines, the "rowProgressive" is automatically recalculated by the procedure.
- For miscellaneous expense lines, at least rowType, rowProgressive, quantity (normally unitary), and expense code must be indicated, as in the following example:
{
    {
        "rowProgressive": 4,
        "rowType": 4.0,
        "qta1": 1.000,
        "variousExpenseCode": "ST",
}
}
Price retrieval when inserting lines If the prices and discounts of warehouse items inserted in the document body are passed with a value of zero, the business logic values them based on the price retrieval configuration set on the document code parameterization used.
If the price and discounts passed in the DTO are different from zero, the values proposed by the price retrieval logic from the configuration will be overwritten with the values passed in the DTO.
Price retrieval when inserting lines If the prices and discounts of warehouse items inserted in the document body are passed with a value of zero, the business logic values them based on the price retrieval configuration set on the document code parameterization used.
If the price and discounts passed in the DTO are different from zero, the values proposed by the price retrieval logic from the configuration will be overwritten with the values passed in the DTO.
Regarding Document scenarios, some examples are made available directly within the POST (Create) call of the IntegrationMG\DocumentMG module in the swagger:
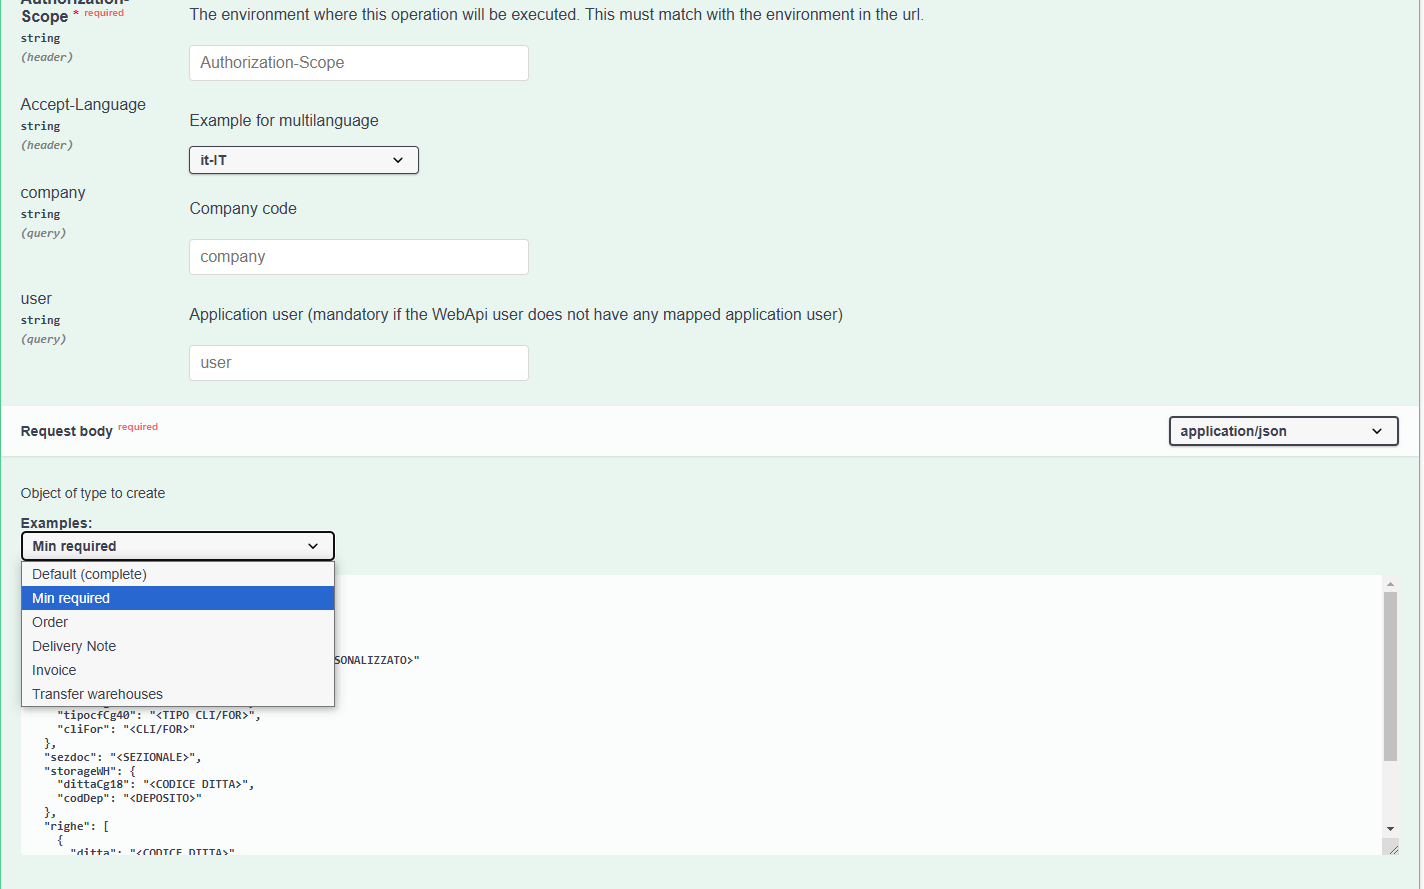
Using the Try it out feature, it will be possible to automatically execute the call, replacing the placeholders indicated in the examples with the appropriate data.
Available Document examples on Swagger:
Default (complete): shows the complete call body; Min required: Minimal mandatory header information; Order: example of an order-type document body; Delivery Note: example of a delivery note-type document body; Invoice: example of an invoice-type document body; Transfer warehouses: example of a warehouse transfer-type document body.
callOptions Property
The callOptions property allows grouping all call options/parameters that are not actual fields of the entity.
Currently, the following options are available:
forceStampDutyToZero(default false): set to true if you want to force the value = 0 of the stamp duty expenses flag;forceCollectionFeesToZero(default false): set to true if you want to force the value = 0 of the collection expenses flag;excludeLoadingMultipleAgents(default false): set to true to exclude the loading of multiple agents in the header;excludeHeaderVat(default false): set to true to force the VAT code of the document header to Null;lockInsertExistingDocument(default false): set to true to block the insertion of an already existing document;disableLetterOfIntent(default false): set to true to disable letters of intent;excludeCSExpensesFixedTexts(default false): set to true to exclude the proposal of default expense and fixed text lines of the Customer.disableExistingItemCheck(default false): Set to true to disable the check for item existence.enableAdditionalValidations(default false): Set to true to enable the mandatory check based on the parameters defined in the Batch Parameters Console.enableEditingInstalments(default false):disablePrevailingRecipient(default false):lockInconsistentDocumentSeguence(default v1: false - default v2 :true): Set to true to enable the consistency check based on document date and document number.
Get Active Entities from Document Wizard
Service that displays all active modules associated with a document based on its configuration through the Document Wizard. Example:
GET {{webapi_base_url}}/api/v1/{{scope}}/MG/CompanyDocumentMasterDataMG/CLI-ORDINE/enablementwizard?company={{defaultCompany}}
The service returns the following Json:
{
    "document": "CLI-ORDINE    ",
    "documentCustom": 1.0,
    "description": "Ordine da clienti",
    "isDocumentHeader": true,
    "isDocumentHeaderReference": true,
    "isDocumentTotal": true,
    "isDocumentHeaderShipmentData": true,
    "isDocumentHeaderCustomizedAttribute": true,
    "isDocumentHeaderOrder": true,
    "isDocumentHeaderStandardAttribute": true,
    "isDocumentHeaderCommission": true,
    "isDocumentHeaderAccrual": true,
    "isDocumentHeaderProject": true,
    "isDocumentHeaderAgent": true,
    "isDocumentRow": true,
    "isDocumentRowOrder": true,
    "isDocumentRowCommission": true,
    "isDocumentRowReference": true,
    "isDocumentRowCustomizedAttribute": true,
    "isDocumentRowStandardAttribute": true,
    "isDocumentRowPackaging": false,
    "isDocumentRowProject": true,
    "isDocumentRowAccrual": true,
    "isDocumentRowLot": false,
    "isDocumentRowAnalyticalCorrelation": true,
    "isDocumentRowIntra": false
}
Management of the Preferred Agent
It is possible to manage the preferred agent when saving a customer (CustomerSupplierCO). Any agent associated with the customer is inserted into the multiple agents as the preferred agent. It is also possible to define additional multiple agents for the customer.
When inserting a document, the multiple agents stored in the customer registry are retrieved.
However, if different agents are specified in DocumentoTestataAgentiMG property during document insertion, these will replace those retrieved from the customer registry.
Through the callOptions property, it is possible to include or exclude multiple agents.
EsclusioneAgentiMultipli = false (with callOptions property or parameter=0 on version 8)
- If the
DocumentoTestataAgentiMGproperty is not set in the DTO, the system will populate theDO29_DOCTESAGENTItable with the agents linked to the customer and retrieved using the usual logic employed by the management software when inserting the document from the interface. - If the
DocumentoTestataAgentiMGproperty is set in the DTO, the system will populate theDO29_DOCTESAGENTItable with the agents mentioned in the previous point and with the agents passed inDocumentoTestataAgentiMG(the two sets of agents are merged).
EsclusioneAgentiMultipli = true (with callOptions property or parameter=1 on version 8)
- The system will populate the
DO29_DOCTESAGENTItable only with any agents passed inDocumentoTestataAgentiMG, ignoring those that would be proposed by the customer configuration.
Price Search from Priority Price Lists
Retrieving Prices When Inserting Rows from Priority Price Lists: PricePriorityLI Service The service allows you to perform a price search from priority price lists through the PricePriorityLI service.
The attached example shows the price of the priority price lists processed based on the Priority Table defined on TSE, used to generate the PricePriorityLI, and displays it in the Result ("RowElaboratePriceList") if the parameter "ResultElaboratePriceList" is set to true.
Parameters
- Price Type (typeSalePurchaseProd):
Decimal(DO11_TIPOCF_CG44/2)
0 = Sales (default)
1 = Purchases
2 = Production - Item Code (CodartMg66):
String(DO30_CODART_MG66) — mandatory - Customer/Supplier Code:
Decimal(DO11_CLIFOR_CG44) - Registration Date:
Datetime(DateElab) — mandatory - Quantity 1 (of row) (qty1):
Decimal(DO30_QTA1) - Price List Number (numPriceList):
Decimal(DO11_LISTMAG) - Warehouse Code (codDepMg58):
String(DO30_CODDEP_MG58) - Enable display of processed price list (resultElaboratePriceList): if set =
true
Example
{
  "typeSalePurchaseProd": 0,
  "codArtMg66": "ART_LI",
  "cliforCg44": 1,
  "dateElab": "2024-06-14 00:00:00",
  "qty1": 0,
  "numPriceList": 1,
  "codDepMg58": "00",
  "resultElaboratePriceList": true
}
Price Search from Parametric Price Lists
Retrieving prices when inserting rows from parametric price lists: PriceParametricLI service The PriceParametricLI service allows you to determine the price based on parametric price lists starting from the priority code defined in the Priority Table on TSE.
This service requires the "PriceParametricParameters" and calls the stored procedure SPLP_QUOTPROBELIST to retrieve the current price with any discounts in "PriceParametricLI".
A new parameter named "calculationType" has been introduced to manage both price calculation and commission calculation within the same service context
A parameter is also provided to request the detail of the outcome of the parametric price list processing, which allows you to understand how the price was formed based on the priority table and the providers used.
WARNING!: Currently, the stored procedure also manages commercial conditions and commissions for document footer, which are not handled in this initial phase (the fixed parameter @RIGA_PIEDE=0 is passed to the stored procedure).
Parameters
- ResultElab bool (default false) Parameter to activate the outcome of the parametric price list processing. If activated, it is necessary to pass to the stored procedure the name of a temporary table where all the price rows found to generate the final price are stored.
- calculationType - 0=Price (default) - 1=Commission - 2=Price+Commission
- dataReg - Registration date --- mandatory
- CodTabPriority int64 (ID_TABPRIORITA) --- mandatory Through the code, the IdTabPriority to be passed to the stored procedure is derived.
- tipocfCg44 - Customer/Supplier Type Decimal (DO11_TIPOCF_CG44) WARNING: Document type conversion: customer= 0 --> becomes 1 and supplier=1 becomes 2 to be passed to the stored procedure.
- cliforCg44 - Customer/Supplier Code Decimal (DO11_CLIFOR_CG44) All customer/supplier fields are read automatically.
- codartMg66 - String (DO30_CODART_MG66) --- mandatory
- documentData - Document date Datetime (DATADOC) If not set, it is valued with the registration date
Example
{
        "resultElab": false,
        "calculationType": 0,
        "dataReg": "2023-06-22T13:34:35.125Z",
        "CodTabPriority": "TVEN",
        "tipocfCg44": 0,
        "cliforCg44": 2,
        "codartMg66": "2",
        "documentData": {
        "qta1": 10,
        "documMg36": "CLI-FATIMM"
        }
}
Retrieve Report List for a Document
The Print/ReportName endpoint allows retrieving a list of all reports available for use with the printPDF service and generating the corresponding streamPDF.
Example of GET request:
{{webapi_base_url}}/api/v1/{{scope}}/MG/Documento/{{NumReg}}/print/reportname?user=admin&company={{azienda}}
The service returns the following Json:
{
    {
    "documentReports": [
        {
            "reportName": "CRMG_DDT_PERS.rpt",
            "description": "Fatt con rpt ddt",
            "path": "C:\\Program Files (x86)\\TeamSystem Software\\Enterprise\\Userfile\\Rpt",
            "default": 1,
            "document": "1-C-FATIMM"
        },
        {
            "reportName": "CRMG_STINTINV_SINT.rpt",
            "description": "Fat Imm CRMG_STINTINV_SINT",
            "path": "C:\\Program Files (x86)\\TeamSystem Software\\Enterprise\\Userfile\\Rpt",
            "default": 0,
            "document": "1-C-FATIMM"
        },
        {
            "reportName": "CRMG_FIM_es_LAS.rpt",
            "description": "ORDf",
            "path": "C:\\Program Files (x86)\\TeamSystem Software\\Enterprise\\Userfile\\Rpt",
            "default": 0,
            "document": "1-C-FATIMM"
        }
    ]
}

}
Print Documents Service: generating document print to PDF
To enable the PDF printing of a document, it is possible to retrieve the streamPDF of a document with a GET request using the Print command. This streamPDF must then be decoded and converted into a PDF using any conversion program.
Example of GET request to generate the streamPDF:
webapi_base_url/api/v1/{{scope}}/MG/Documento/<NumeroDocumento>/print?company={{defaultCompany}}
The service returns the following Json:
{
    "streamPDF": "JVBERi0xLjMgCiXi48/ …………………………………….. ",
    "error": ""
}
The content of the streamPDF must be copied and inserted into any conversion program to proceed with decoding and converting it into a PDF.
Warning - in case of archived and valid print: in the case of archived and valid print, it is necessary to re-export, and the program retrieves the archived PDF from the disk.
Extension of PDF Printing Functionality
The PDF printing service has been extended: in addition to generating the standard document via streamPDF, it is now possible to print custom reports associated with the document type Example of GET request to generate the streamPDF:
{{webapi_base_url}}/api/v1/{{scope}}/mg/documento/{{numreg}}/print?user=admin&company={{azienda}}&reportname=CRMG_STINTINV_SINT.rpt
The service returns the following Json:
{
    "streamPDF": "JVBERi0xLjMgCiXi48/ …………………………………….. ",
    "error": ""
}
The reportName field allows dynamic selection of the desired print layout, either Crystal or Jasper, making the system more flexible and adaptable to specific requirements.
KIT management
It is possible to search, insert, modify, and delete a kit and consequently use it within appropriately configured documents (General Document Parameters - Customization) with the related explosion of components in the document rows.
Using the Master KitWH and Detail KitLinkWH entities, it is possible to create simple kits by defining only the item and quantity
{
    "codProductMg66": "BICI",
    "dittaCg18": {{azienda}},
    "exclusionChild1Mg82": null,
    "exclusionChild2Mg82": null,
    "exclusionChild3Mg82": null,
    "exclusionChild4Mg82": null,
    "exclusionFather1Mg82": "OR",
    "exclusionFather2Mg82": "BO",
    "exclusionFather3Mg82": "FA",
    "exclusionFather4Mg82": "PR",
    "optionProductMg5e": "",
    "kitLinkWH": [
        {
            "codComponentMg66": "BICI2",
            "optionComponentMg5e": "",
            "qtyComponent1": 10.000000
        },
        {
            "codComponentMg66": "MSE003",
            "qtyComponent1": 15.000000
        }
    ]
}
or create complete kits, where it is possible to set additional properties:
{
    "codProductMg66": "MSE002",
    "dittaCg18": {{azienda}},
    "exclusionChild1Mg82": null,
    "exclusionChild2Mg82": "BO",
    "exclusionChild3Mg82": "PR",
    "exclusionChild4Mg82": null,
    "exclusionFather1Mg82": "OR",
    "exclusionFather2Mg82": "BO",
    "exclusionFather3Mg82": "FA",
    "exclusionFather4Mg82": "PR",
    "optionProductMg5e": "",
    "kitLinkWH": [
        {
            "codComponentMg66": "BICI2",
            "optionComponentMg5e": "",
            "StartingDate": "2024-01-15T00:00:00",
            "endingDate": "2024-12-31T00:00:00",
            "qtyComponent1": 13.000000,
            "qtyComponent2": 10.000000,
            "fixedQta": 1,
            "typeBomLink": 3,
            "typeOptionalLink": 1,
            "typeVal": 2,
            "costComponent": 10.0000
        },
        {
            "codComponentMg66": "BICI",
            "optionComponentMg5e": "",
            "StartingDate": "2024-01-15T00:00:00",
            "edningDate": "2024-06-31T00:00:00",
            "qtyComponent1": 25.000000,
            "qtyComponent2": 33.000000,
            "fixedQta": 1,
            "typeBomLink": 3,
            "typeOptionalLink": 0,
            "typeVal": 3,
            "costComponent": 150.0000
        }
    ]
}
KIT Components That Are Themselves KITs
When managing a KIT, the IdKitNode property allows you to determine whether a component is a raw material or another KIT. This can be seen in the following sample request:
GET {{webapi_base_url}}/api/v1/{{scope}}/WH/KitWH/{{idKit}}?company={{defaultCompany}}&utente=admin
The response contains two KIT rows. In one case, the idKitNode value is null, indicating that the component is a raw material. In the other case, the value is a non-null number, which corresponds to the ID of a child KIT—meaning it is not a raw material but another KIT.
The sample response is:
{
    "codProductMg66": "KSE001",
    "codTypeBom": "",
    "dittaCg18": 2.0,
    ...
    "kitLinkWH": [
        {
            "codComponentMg66": "KSE002",
            ...
            "idKitNode": 31.0,  // child KIT ID
            ...
        },
        {
            "codComponentMg66": "00003",
            ...
            "idKitNode": null, // raw material
            ...
        }
    ],
    ...
}
Inserting Document with Kit Type Item Code
Through a standard document insertion call, it is possible to include a Kit type item code among the document rows. The explosion of the related components and the explosion mode must be predefined by the ERP in General Document Parameters, Document Customization, or Company Document Customization, depending on the company's needs.
The following example involves the insertion of a DDT using the customized document type 'C-DDT', which includes two document rows:
- One with a normal item code.
- The other with a Kit type item code.
This document type provides for the explosion of the Kit components, with each component being listed on the document as a descriptive row.
{
    "valutaCg08": "EURO",
    "anagraficaDocumentoDitta": {
        "codDocumMg36": "C-DDT",
        "indStaperMg36": 1.0
    },
    "customerSupplierMG": {
        "tipocfCg40": 1,
        "cliFor": 1
    },
    "sezdoc": "00",
    "storageWH": {
        "codDep": "00"
    },
    "righe": [
        {
            "progrRiga": 1.0,
            "codartMg66": "ART001",
            "descart": "Articolo ordinario",
            "qta1": 15.000
        },
        {
            "progrRiga": 1.0,
            "codartMg66": "MSE002",
            "descart": "Articolo kit",
            "qta1": 15.000
        }
    ]
}
Automatic Generation of Kit Product Loading Documents and Kit Component Unloading Documents
If the sales or customer commitment document contains Kit item lines, but the document type used does not provide for the generation of Kit Product Loading and Kit Component Unloading, or if a Kit Product Loading document is entered without component explosion, it is possible to perform this at a later time using the KitDocumentService.
The service includes two actions:
- unloadcomp which allows the unloading of Kit components at the first level, based on the existing Kit Product Loading documents;
- loadkit which allows the creation of the Kit Product Loading document and the Kit Component Unloading document, based on the sales or customer commitment documents considered.
Batch Generation for Kit Product Loading and Component Unloading For the correct generation of the documents in question, it is noted that the batch movement for the Product Loading document must be defined in the Batch Console for "Single Item", while for the Component Unloading document it must be defined for "Multiple Items".
Generation of Kit Component Unloading Documents
The KitDocumentService, through the unloadcomp action, allows the unloading of Kit components at the first level, based on the entered Kit Product Loading documents for which the component explosion and the corresponding component unloading have not been performed. If there are also Semi-finished products, a loading document for the Semi-finished product and an unloading document for the components of the Semi-finished product are generated.
Here is a practical example: The item code KIT is composed of item code (component1) 00001 and item code (component2) 00002. A Kit Product Loading document is entered with two item lines, both referring to the item code KIT but with different quantities and prices. Document number 40 dated 08/07/2025 is generated, and the component explosion is not performed.
To generate the Kit Component Unloading document at a later time, the following call must be executed:
webapi_base_url/api/v1/{{scope}}/MG/KitDocumentService/unloadcomp?company={{defaultCompany}}
In the body of the call, you must specify the necessary parameters to generate the new document (unloadComponentKitParameter) and define the necessary parameters for a sort of selection/search at the document header level (headLoadDocumentsFilter) and/or at the document line level (rowLoadDocumentsFilter), where you define the details of the Kit Product Loading document under consideration and/or the Kit item code. These parameters are mandatory (as per the interface):
{
  "loadDocumentCodeFilter": "INT-CARKIT",
  "unloadComponentKitParameter": {
    "documentCode": "INT-SCARKIT",
    "postingDate": "2025-07-08",
    "documentDate": "2025-07-08",
    "documentSectional": "00",
    "documentNumber": 0,
    "storageCode": "00",
    "indExplosionLevel": "0",
    "numberLevel": 1,
    "indSemiFinishedProducts": "0",
    "recalculateCostKitProduct": false,
    "includeBOMComponents": false
  },
  "headLoadDocumentsFilter": {
    "filters": {
      "items": [
        {
          "propertyName": "datadoc",
          "comparer": 0,
          "value": "2025-07-08"
        },
        {
          "operator": 1,
          "propertyName": "numdoc",
          "comparer": 0,
          "value": 40
        }
      ]
    }
  },
  "rowLoadDocumentsFilter": {
    "filters": {
      "items": [
        {
          "propertyName": "codartMg66",
          "comparer": 0,
          "value": "KIT"
        }
      ]
    }
  }
}
The response lists the generated documents based on the item lines highlighted in the above search.
{
{
    "numRegLoadProductKit": [],
    "numRegUnloadComp": [
        "202500000897",
        "202500000898"
    ]
}
}
Simultaneous Generation of Kit Product Loading Documents and Kit Component Unloading Documents
The KitDocumentService, through the loadkit action, allows the generation of Kit Product Loading Documents based on the entered sales documents. For each Kit Product Loading Document, it is also possible to simultaneously generate the corresponding Kit Component Unloading Documents
Here is a practical example: We always consider the item code KIT, composed of item code (component1) 00001 and item code (component2) 00002. A sales document is entered with a KIT item line with document number 408 dated 08/07/2025, and the components are not exploded.
To generate the Kit Loading Document and the Kit Component Unloading Document, the following call must be executed:
webapi_base_url/api/v1/{{scope}}/MG/KitDocumentService/loadkit?company={{defaultCompany}}
In the body of the call, you must specify the necessary parameters to generate the new Kit Product Loading Document (loadProductKitParameter) and the parameters for the new Kit Component Unloading Document (unloadComponentKitParameter). In the body, it is also possible to apply search filters at the document header level, using the parameters (headLoadDocumentsFilter) and/or at the line level (rowLoadDocumentsFilter). In this case, you specify the details of the relevant sales document and/or the Kit item code under consideration:
{
{
  "loadProductKitParameter": {
    "documentCode": "INT-CARKIT",
    "postingDate": "2025-07-08",
    "documentDate": "2025-07-08",
    "documentSectional": "00",
    "documentNumber": 100
  },
  "unloadComponentKitParameter": {
    "documentCode": "INT-SCARKIT",
    "postingDate": "2025-07-08",
    "documentDate": "2025-07-08",
    "documentSectional": "00",
    "documentNumber": 101,
    "storageCode": "00",
    "indExplosionLevel": "0",
    "numberLevel": 1,
    "indSemiFinishedProducts": "0",
    "recalculateCostKitProduct": false,
    "includeBOMComponents": false
  },
  "headUnloadDocumentsFilter": {
    "filters": {
      "items": [
        {
          "propertyName": "datadoc",
          "comparer": 0,
          "value": "2025-07-08"
        },
        {
          "operator": 1,
          "propertyName": "numdoc",
          "comparer": 0,
          "value": 408
        }
      ]
    }
  },
  "rowUnloadDocumentsFilter": {
    "filters": {
      "items": [
        {
          "propertyName": "codartMg66",
          "comparer": 0,
          "value": "KIT"
        }
      ]
    }
  }
}
}
The response lists the documents corresponding to the Kit Product Loading (numRegLoadProductKit) and the documents related to the Kit Component Unloading (numRegUnloadComp), based on the item lines under consideration.
{
{
    "numRegLoadProductKit": [
        "202500000904"
    ],
    "numRegUnloadComp": [
        "202500000905"
    ]
}
}
Inserting a Document with Item Lines Associated with a Batch Code
When inserting a document, it is possible to include among the document lines an item code associated with one or more batch codes.
The following example shows the insertion of a Delivery Note using the custom document type 'C-DDT', which includes two document lines:
- One with a standard item code.
- Another with item code ART_LOT associated with two different batch codes "00001" and "00002" with quantities of 15 and 20 respectively.
The document type mentioned above must obviously support batch management, as defined in the Batch Parameters Console.
{
    "valutaCg08": "EURO",
    "anagraficaDocumentoDitta": {
        "codDocumMg36": "C-DDT",
        "indStaperMg36": 1.0
    },
    "customerSupplierMG": {
        "tipocfCg40": 1,
        "cliFor": 1
    },
    "sezdoc": "00",
    "storageWH": {
        "codDep": "00"
    },
  "righe": [
    {
      "progrRiga": 1,
      "codartMg66": "ART_LOT",
      "descart": "Articolo con gestione lotti",
      "qta1": 35,
      "rigaLotti": [
        {
          "prog": 1,
          "parametroMovimentazioneLotto": {
            "prog": 1
          },
          "codDepMg58": "00",
          "codArtMg66": "ART_LOT",
          "opzioneMg5e": " ",
          "qta1": 15,
          "anagraficaLotto": {
            "codArtMg66": "ART_LOT",
            "opzioneMg5e": "",
            "codLotto": "0001"
          }
        },
        {
          "prog": 2,
          "parametroMovimentazioneLotto": {
            "prog": 1
          },
          "codDepMg58": "00",
          "codArtMg66": "ART_LOT",
          "opzioneMg5e": " ",
          "qta1": 20,
          "anagraficaLotto": {
            "codArtMg66": "ART_LOT",
            "opzioneMg5e": "",
            "codLotto": "0002"
          }
        },
        {
            "progrRiga": 3.0,
            "codartMg66": "ART001",
            "descart": "Articolo ordinario",
            "qta1": 15.000
        }
      ]
    }
  ]
}
For each lot row linked to the item row, the parametroMovimentazioneLotto row parameter has a value depending on the code specified in the Defined Item Combinations in the Lot Parameters Console, corresponding to the Movement Type.
In this example, prog. 1 corresponds to Movement Type = Lots (or tipo_mov=LOT), and in the Lot Parameters Console the mandatory row check is enabled.
Therefore, if the item row quantity does not match the sum of the quantities of the corresponding lot codes, the response will return an error or warning message, as shown in the example below.
Balancing check of batches quantity
The balancing check is performed on the quantity of the batches, both when is active the "Balancing check for document", and when is active the "Balancing check for movement". In the second case, the check on the front-end is performed by the batch entry program for each item line indicated in the document.
In the case of non-balancing batch control, for example an item line of 10 pcs and a batch line with a quantity of 3 pcs, an error or a warning is reported based on the "Balancing check for document" parameter defined in the Batch parameters console:
-
A Warning will be reported if the parameter = "Ask whether to continue document registration" has been selected
-
An Error will be reported if, instead, the parameter = "Block document registration" has been selected
Both error or warning reports can be forced by adding the base url &force=16099
Example of a message with incorrect quantities item details and warning report:
{
    "items": [
        {
            "message": "Check balancing by document:\r\n Reg: 202500000578 \r\n - Item: 1_KIT_LOTTO qty1: 5 (Type mov.: LOT qty1: 0)\r\n Reg: 202500000579 \r\n - Item: 1_KIT_LOT2/42 W qty1: 10 (Type mov.: LOT qty1: 0)\r\n(Source: CMD_GENERACAR_ButtonClick)",
            "warningCode": 16099,
            "isWarning": true,
            "isError": false,
            "dtoName": null,
            "dtoPropertyName": null,
            "entityPropertyPath": null
        }
    ],
    "extensionData": [],
    "additionalData": {},
    "pluginData": {}
}
Transfer Document Between Warehouses
It is possible to issue an outbound warehouse DDT, automatically generating a new inbound warehouse DDT.
In the JSON for the Header part, the storageWH properties for the originating warehouse must be filled out
{
    "storageWH": {
        "codDep": "00"
    }
}
and storageWHCollegato for the destination warehouse
{
"storageWHCollegato": {
        "codDep": "01",
        "descrdep": "Deposito secondario",
    }
}
If within a document the user wants to define a row warehouse different from the header warehouse, in the JSON file, in the document rows section, coddepcolMg58 and coddepMg58 must be filled out :
{
    "coddepcolMg58": "01",
     "coddepMg58": "00",
}
where the first indicates the destination warehouse and the second indicates the originating warehouse.
Document service
DocumentService contains a set of processing services to complement the CRUD part of the documents, such as transformation, fulfillment, order portfolio fulfillability check, and bulk insertion of synchronous and asynchronous document types.
Document Transformation 1-to-1 and Fulfillment Status Check
The attached example presents the ERP-B2C interaction scenario that involves the insertion of a Customer Order with:
- Minimal mandatory header information
- Item type row, with item code and quantity (price retrieved from the price list in the BO)
Regarding Document Transformation (transform), with the following call:
webapi_base_url/api/v1/{{scope}}/MG/DocumentService/transform?company={{defaultCompany}}&force=24368,89522
The document is transformed into an invoice by specifying the registration number of the source order document and the related transformation model. The response includes the registration number of the generated invoice.
The service retrieves the parameters from "DocumentTransformationParameterDTO," which contains the transformation model defined on the ERP and the list of registration numbers of the source documents. It returns in "DocumentTransformationMGDTO" the list of registration numbers of the generated documents.
DocumentTransformationParameterDTO
{
"[NumRegOrigin]"  - obbligatorio (Numero di registrazione che si vuole trasformare/evadere)
"CodModelTransfDoc" - obbligatorio (Codice modello per la trasformazione documento)
}
DocumentTransformationResponseDTO
{
"<NumRegDestination>" - (Elenco dei numero di registrazione creati)
}
In case of warning messages it is possible to override them with the following parameters:
&force=24368: in the Presence of Blocked Article Notifications; &force=29074: in the Presence of Notifications for Articles and Batches Transformed Understock.
The following Lookups are also available to trace transformation models and their composition, as well as Lookups that query beyond the already existing entities:
- ModelTrasformationCompanyMG: with details in ModelTrasformationCompanyDetMG
- ModelTrasformationMG: with details in ModelTrasformationDetMG
These contain the source and destination document codes used by the transformation model:
- General Transformation Models Lookup: View all models (general archive) detailed with source and destination documents
webapi_base_url/api/v1/{{scope}}/MG/Lookup/ModelTrasformationMG

- **General Transformation Models Details Lookup**: View All Model Details (general archive)

webapi_base_url/api/v1/{{scope}}/MG/Lookup/ModelTrasformationDetMG

- **General Transformation Models Lookup**: View Activated Models by Company (Without Details)

webapi_base_url/api/v1/{{scope}}/MG/Lookup/ModelTrasformationCompanyMG

- **Transformation Models Lookup with Document Details**: View Activated Models by Company or General Archive with details of actual source and destination documents. The property **ModelTrasformationCompanyMG.IndEvasmult** is retrieved from the ERP. If set to 99, the documents from the general archive are used. If set to 1, the company's documents are used instead.

webapi_base_url/api/v1/{{scope}}/MG/Lookup/ModelTrasformationCompanyDetMG
webapi_base_url/api/v1/{{scope}}/MG/Lookup/ModelTrasformationCompanyWithCodeDoc
Check Fulfillment Status
Subsequently, with the Check Fulfillment Status lookup, it is possible to indicate the registration number or the document number of the initial order. The response returns the list of rows of the document indicated in the input with the respective fulfillment status (document quantity, fulfilled quantity, remaining quantity) and reference to the rows that have picked up the document.
Regarding the Document Fulfillment Status Check (docprocessingstatus), the following call:
webapi_base_url/api/v1/{{scope}}/MG/DocumentService/docprocessingstatus?company={{defaultCompany}}&user=admin&loadEntireDomain=true&getTotalCount=true
process the result based on a typical Search. Through a POST Action, allows setting all the properties exposed by the reference DTO dynamically in the body and returns a collection of entities containing the rows of the reference document with their progress statuses and their own fulfillment status
In the query parameter, it is also possible to set the pagination criterion with totals, by setting the parameter "getTotalCount" to True.
Additionally, a Lookup service for querying the fulfillment status of individual orders is available as shown below:
webapi_base_url/api/v1/{{scope}}/MG/Lookup/DocumentoStatoEvasoMG?metadata=true&company={{defaultCompany}}&_op=search
Order Portfolio Fulfillment
The Order Portfolio Fulfillment service, which belongs to the external shipping scenario, allows retrieving the order portfolio fulfillment list for shipping set in the ERP by indicating the parameter used, in this case 1, and with fulfillment type for each item, in synchronous mode. The order list is visible in the response.
To retrieve the list of fulfillable orders for shipping, make the following call:
webapi_base_url/api/v1/{{scope}}/MG/DocumentService/orderavailability?company={{defaultCompany}}
{
    "LimiteEvadibilita": 1,
    "tipoEvadibilita": 0,
    "codart":"",
    "IsAsyncMode": "true",
    "MinExpire": "180"
}
The LimiteEvadibilita parameter allows pre-parameterization of filters via ERP, which will be considered during the payload phase in the POST request. It is also possible to define the type of fulfillment (tipoEvadibilita), with the default value being 0.
The values accepted by the "tipoEvadibilita" node in the body are:
- 0 overall for all items (default);
- 1 for selected item;
- 2 overall for all documents.
If the IsAsyncMode parameter of the call is set to false, the processing will occur sequentially, requiring the response with the resulting result set to be awaited.
The IsAsyncMode node, if set to 'true', will ensure that the value retrieval is handled asynchronously, altering the usual behavior of the requests; in this case, all items are considered, and a GuidSession is returned in the response.
With the returned "guidSession", it will be possible to retrieve the result through:
- appropriate Lookup Set on the Entity:
webapi_base_url/api/v1/{{scope}}/MG/Lookup/DocumPortfolioEvaMG?metadata=true&company={{defaultCompany}}&_op=search
- or by reusing the same call endpoint, expanding the body with the obtained "guidSession" node:
webapi_base_url/api/v1/{{scope}}/MG/DocumentService/orderavailability?company={{defaultCompany}}
{
    "LimiteEvadibilita": 1,
    "tipoEvadibilita": 0,
    "codart":"",
    "IsAsyncMode": "true",
    "MinExpire": "180",
    "guidSession": "{{guidSession}}"
}
The "MinExpire" parameter allows you to set the duration of persistence between calls of the result, expressed in minutes, and will be used to simulate a cache of the data grid stored in a table. With each call, the table will be cleaned of rows of previous results that have expired the expected time terms (MGM2_PORTAFOGLIOORDINI).
For both synchronous and asynchronous modes, it is possible to retrieve the list of portfolio availability by filtering for individual items and their variants.
Example with "tipoEvadiblità":1, which means searching for portfolio order availability by item and filtering by variant:
{
    "LimiteEvadibilita": 1,
    "tipoEvadibilita": 1,
    "codart":"{{Articolo1}}",
    "variante":"{{Variante}}",
    "IsAsyncMode": "false",
    "MinExpire": "180"
}
In the body of the call, it is important to correctly specify the "variant" filter by exactly following the indication scheme configured in the TSE management system, that is, indicating the variants with the same number of characters as configured in the management system.
- The delete operation allows you to remove the set of processes for GuidSession.
The Lookup Borderaux allows the display of a list of document rows with shipment data in a styled format borderaux.
A Lookup is also available that allows the display of a list of document rows with shipment data in Borderaux style, by executing the following call:
webapi_base_url/api/v1/{{scope}}/MG/Lookup/BorderauxMG?metadata=true&company={{defaultCompany}}&_op=search
Transformation of Documents Partial Evasion to Value
NThe attached example shows how to manage order fulfillment based on value only as an alternative to order fulfillment based on quantity.
As for Document Transformation (transform), this is performed through the following call:
webapi_base_url/api/v1/{{scope}}/MG/DocumentService/transform?company={{defaultCompany}}&force=24368,89522
The transformation into a DDT is performed by indicating the original registration number of the order document and the related transformation template. The response contains the registration number of the generated DDT.
The service retrieves parameters from "DocumentTransformationParameterDTO," which contains the transformation model defined in the ERP and the list of source document registration numbers. It returns the list of generated document registration numbers to "DocumentTransformationMGDTO."
DocumentTransformationParameterDTO
{
    "numRegOrigin": ["202600009760"],
    "CodModelTransfDoc": "N-CLI-ORDDDT",
    "documentTransformationPartialEvadContainerGeneralData": [
    {
      "numRegOrigin": "202600009760",
      "documentTransformationGeneralData": [
        {
          "codartMg66": "ART001",
          "valTransf": 12
        }
      ]
    }
  ]
}
Document Transformation Order Fulfillment with Lots
Within the WebAPI, it is possible to transform a Customer Order type document into a Transport Document (DDT), including batch management at document line level.
The attached example shows how to manage an order fulfillment with lots.
As for Document Transformation (transform), this is performed through the following call:
{{webapi_base_url}}/api/V1/{{scope}}/mg/DocumentService/transform?company={{azienda}}&force=24368,29074
The transformation process allows you to generate one or more delivery notes from a customer order, maintaining the header and detail information, and integrating, where applicable, the data relating to the traceability of the items (batches).
During the transformation:
- the system validates the batch data with respect to:
- existence of the batch;
- availability;
- consistency with the item and warehouse;
- any partial fulfillment of order lines is handled;
- for each transformed line:
- the delivery note detail is created with its association to the lots;
- the link with the source document is maintained (document-to-document traceability).
Total order fulfillment
{
    "numRegOrigin": ["202600009936"],
    "CodModelTransfDoc": "CLI-ORDDDT"
}
Partial evasion with indication of the lot
{
    "numRegOrigin": ["202600000115"],
    "CodModelTransfDoc": "1-CLI-ORDDDT",
    "documentTransformationPartialEvadContainerGeneralData": [
    {
      "numRegOrigin": "202600000115",
      "documentTransformationGeneralData": [
        {
          "codartMg66": "1_LOT",
          "qtaTransf": 5,
          "price1": 60,
          "price2": 0,
          "scper1": 0,
          "scper2": 0,
          "scImp": 0,
          "increase1": 0,
          "increase2": 0,
          "increaseImp": 0,
          "rowNotEvad": true,
          "lots": [
            {
                "lotCode": "lotCode",
                "serialNumber": "serialNumber",
                "packagingCode": "packagingCode",
                "palletsCode": "palletsCode",
                "materialsDyeingCode": "materialsDyeingCode",
                "locationCode": "locationCode",
                "qty1": 4
            },
            {
                "lotCode": "2024LOT0000004",
                "qty1": 4
            },
            {
                "lotCode": "2024LOT0000003",
                "qty1": 1
            }
            ]
        },
        {
          "codartMg66": "PIPPO",
          "qtaTransf": 5,
          "price1": 60,
          "price2": 0,
          "scper1": 0,
          "scper2": 0,
          "scImp": 0,
          "increase1": 0,
          "increase2": 0,
          "increaseImp": 0,
          "rowNotEvad": false,
          "lots": [
            {
                "lotCode": "lotCode",
                "serialNumber": "serialNumber",
                "packagingCode": "packagingCode",
                "palletsCode": "palletsCode",
                "materialsDyeingCode": "materialsDyeingCode",
                "locationCode": "locationCode",
                "qty1": 4
            },
            {
                "lotCode": "BBBB",
                "qty1": 2
            }
            ]
        }
      ]
    }
  ]
}
Document Transformation 1 to n (DDT Fulfillment and Invoice Generation)
Starting from a source document, multiple destination documents can be automatically generated (Document Transformation 1 to n) through the configuration of the Line Break on the document transformation model used. The line break elements are those managed in the ERP:
- Article payment
- Warehouse reason
- Deposit
- Linked deposit
- Location
- Division
- Article 62 goods indicator
- CIG/CUP
Simulating a document transformation call for line break by deposit, the response returns n numRegDestination for each line deposit present in the source document, where the coddepMg58 (line deposit) is valued differently for each article line in the source document (DDT). In the chosen Transformation model for the call, the line break by deposit is defined through the Interface. At this point, the call is made to perform the document transformation, indicating the source document registration number (DDT) and the specific transformation model (which manages the line break by deposit) to generate the corresponding n invoices. The response will return n destination registration numbers related to the generated invoices, corresponding to each line deposit managed in the source document.
{
    "numRegDestination": [
        "202400000494",
        "202400000495"
    ]
}
Document Transformation n to n
Upon entering a supplier order with:
- Minimal mandatory header information
- Two article lines, with different article codes and quantities
A call is then made to perform the Document Transformation into DDT, indicating the source registration number and the related transformation model, while the response retrieves the registration number of the generated DDT.
Some use cases are provided as examples, including the relevant body of the call:
Complete fulfillment of a document, with the source document number carried over to the destination document
To correctly carry over the source document to the destination document to be generated, it is necessary to fill in the parameter "DocumentTransformationProcessExtremLimitDTO" and set AcceptDocMode = 1.
{
    "numRegOrigin": ["202400000288"],
    "codModelTransfDoc": "{{TrasformazioneORD-DDT}}",
    "processExtremLimits": {
        "acceptDocMode": 1,
        "destinationDocParams": {
            "dataReg": "2024-10-14",
            "dataDoc": "2024-10-14",
            "dataCompVatMan": "2024-10-14",
            "sezdoc": "00",
            "numDoc": 101.0,
            "numDocOrig": 19.0
        }
    }
}
Simultaneously with the document transformation, it is also possible to apply one or more filters, defined in SearchDTO.
Partial fulfillment of one or more document lines, specifying only the "progrRiga" of the source document
If you want to partially fulfill one or more document lines, you also need to specify the additional parameters in DocumentTransformationPartialEvadContainerGeneralDataDTO for each numRegOrigin in the request.
Note:
- numRegOrigin - obbligatorio (Registration number to be transformed)
- progrRiga - obbligatorio (Line number corresponding to the document line to be transformed)
- qtaTransf - obbligatorio (The quantity to be carried over to the destination document)
{
    "numRegOrigin": ["202400002619"],
    "codModelTransfDoc": "1-FOR-ORDDDT",
    "processExtremLimits": {
        "acceptDocMode": 1,
        "destinationDocParams": {
            "dataReg": "2024-10-01T09:29:27.355Z",
            "dataDoc": "2024-10-01T09:29:27.355Z",
            "dataCompVatMan": "2024-10-01T09:29:27.355Z",
            "sezdoc": "00",
            "numDoc": 42,
            "numDocOrig": 44
        }
    },
    "documentTransformationPartialEvadContainerGeneralData": [
        {
            "numRegOrigin": "202400002619",
            "documentTransformationGeneralData": [
                {
                    "progrRiga": 1,
                    "qtaTransf": 2
                },
                {
                    "progrRiga": 2,
                    "qtaTransf": 4
                }
            ]
        }
    ]
}
Partial fulfillment of n source documents, also applying any price variations and percentage discounts
If you want to fulfill the order with any price or discount variations or surcharges compared to the source document, you need to fill in the appropriate corresponding parameters. If you want to maintain the commercial conditions of the source document, these parameters should not be included in the request.
{
    "numRegOrigin": [
        "202400002730",
        "202400002731"
    ],
    "codModelTransfDoc": "1-FOR-ORDDDT",
    "processExtremLimits": {
        "acceptDocMode": 1,
        "destinationDocParams": {
            "dataReg": "2024-10-14T09:29:27.355Z",
            "dataDoc": "2024-10-14T09:29:27.355Z",
            "dataCompVatMan": "2024-10-14T09:29:27.355Z",
            "sezdoc": "00",
            "numDoc": 104,
            "numDocOrig": 96
        }
    },
    "documentTransformationPartialEvadContainerGeneralData": [
        {
            "numRegOrigin": "202400002730",
            "documentTransformationGeneralData": [
                {
                    "progrRiga": 1,
                    "qtaTransf": 5,
                    "price1": 300,
                    "scper1": 2
                },
                {
                    "progrRiga": 2,
                    "qtaTransf": 3,
                    "price1": 100,
                    "scper1": 2.5
                }
            ]
        },
{
            "numRegOrigin": "202400002731",
            "documentTransformationGeneralData": [
                {
                    "progrRiga": 1,
                    "qtaTransf": 2
                },
                {
                    "progrRiga": 2,
                    "qtaTransf": 4
                }
            ]
        }
    ]
}
Complete fulfillment of n documents, applying a filter by article code
{
    "numRegOrigin": [
        "202400002401",
        "202400002402"
    ],
    "codModelTransfDoc": "1-FOR-ORDDDT",
    "processExtremLimits": {
        "acceptDocMode": 1,
        "destinationDocParams": {
            "dataReg": "2024-10-04",
            "dataDoc": "2024-10-04",
            "dataCompVatMan": "2024-10-04",
            "sezdoc": "00",
            "numDoc": 102.0,
            "numDocOrig": 76.0
        }
    },
    "rowSearchTransformationCriteria": {
        "filters": {
            "items": [
                {
                    "operator": 0,
                    "comparer": 0,
                    "propertyName": "CodartMg66",
                    "value": "{{Articolo1}}"
                }
            ]
        }
    }
}
Partial fulfillment of a document, partially fulfilling the first line and declaring the second line as "No longer fulfillable" for the remaining quantit
If, during the partial fulfillment of a document, you want to declare a document line as No longer fulfillable, you need to set the rowNotEvad parameter to "true" for the corresponding progrRiga.
{
    "numRegOrigin": [
        "202400002889"
    ],
    "codModelTransfDoc": "1-FOR-ORDDDT",
    "documentTransformationPartialEvadContainerGeneralData": [
        {
            "numRegOrigin": "202400002889",
            "documentTransformationGeneralData": [
                {
                    "progrRiga": 1,
                    "indtiporiga": 0,
                    "qtaTransf": 3.0
                },
                {
                    "indtiporiga": 0,
                    "progrRiga": 2,
                    "qtaTransf": 4.0,
                    "rowNotEvad": true
                }
            ]
        }
    ]
}
Bulk Document Insertion
The attached example presents the scenario of an integrated vertical for warehouse management that allows the bulk insertion of multiple documents, for example, 3 immediate invoice documents, composed of:
- 8 article lines
- 1 line with a KIT article
- 1 line with a manual article
The response of the bulk document insertion call will release a GuidSession that can be queried using Lookup.
There are two types of Lookup:
- Analytical Detail: Returns a list with analytical details related to the progress status of the bulk document insertion processing.
- Structured List: Returns a structured list to check the progress status of the bulk document insertion processing.
The delete operation allows you to delete the set of processes for GuidSession.
In the event that, following Bulk Document Insertion, some of these documents are in an error state, it is possible, after identifying and correcting the error on the document, to use the reprocessing service. This service allows you to proceed with the insertion of the corrected documents that were in error
With the release of version 202502000 release version it is possible to use a customer item code or a supplier item code also in the mass insertion service. Simply report in the Body of the POST call the entity codartcli instead of codartMg66 as shown below:
{
        "righe": [
        {
            "progrRiga": 1.0,
            "codartcli": "ARTCLI124500",
            "qta1": 1.000
        }
        ]
}
Import/Export services
External Price List Acquisition: Service IEImportLI
The IEImportLI service allows the import of price lists provided by third parties in different formats (supported formats: excel/csv). Through this service, it is possible to import an article price list for a specific supplier from an external file in synchronous or asynchronous mode, using a specific import template.
To perform the price list import from an external file, the following call must be made:
webapi_base_url/api/v1/{{scope}}/LI/IEImportLI/pricelist?company={{defaultCompany}}
The service retrieves the parameters from ImportParameterDTO and returns in the response in ImportExportResultDTO the number of rows successfully imported and the number of rows not imported with the corresponding error report.
ImportParameterDTO
CodLayout - mandatory (Trace code to be used for the import) TypeSalePurchase - mandatory (Price list type: 0 = Sales, 1 = Purchase) StreamFileImport – mandatory (File to be imported in Base64 format)
ImportExportResultDTO
guidSession - processing guid stateProcess - processing status idStateProcess - ID corresponding to the processing status headProcess: guidResult - Import result guid totRowImpExp- Total number of rows to import impExpWithErrors rowElab - Rows subject to import typeResult - id corresponding to the import result typeResultDescription - information description - description of import notes and any errors
Inoltre sono disponibili le chiamate su entità di base, necessarie per effettuare l'importazione listini fornitore: LayoutCO con dettaglio IELayoutCODTO per recuperare il codice tracciato da utilizzare, StructureType con dettaglio IEStructureTypeCODTO e StructureSubType con dettaglio IEStructureSubTypeCODTO che corrispondono al Tipo struttura e Sottotipo struttura legati al tracciato in uso.
Additionally, the following base entity calls are available, necessary for importing supplier price lists: LayoutCO with detail IELayoutCODTO to retrieve the tracking code to use, StructureType with detail IEStructureTypeCODTO, StructureSubType with detail IEStructureSubTypeCODTO, corresponding to the structure type and substructure type related to the layout in use.
webapi_base_url/api/v1/{{scope}}/CO/IEStructureTypeCO/{{CodStructureType}}?company={{defaultCompany}}
webapi_base_url/api/v1/{{scope}}/CO/IEStructureSubTypeCO/{{CodStructureSubType}}?company={{defaultCompany}}
webapi_base_url/api/v1/{{scope}}/CO/IELayoutCO/{{CodLayout}}?company={{defaultCompany}}&CodStructureType={{CodStructureType}}
The service accepts layouts with CodStructureType = 18 and supports both CodStructureSubType = 4 (Customer/Supplier Price List) and CodStructureSubType = 1 (Item master data Price List)
Example
The example provided imports a supplier price list from an external file converted to Base64 (indicated in "StreamFileImport"), based on the layout previously defined in the ERP and setting the mandatory parameters.
// body content
{
    "TypeSalePurchase" : "1",
    "CodLayout": "{{CodLayout}}",
    "StreamFileImport":
}
During the import of the supplier price list, it is also possible to simultaneously:
- Create new items (present in the file and not present in the ERP) by setting the parameter "insertNewItem": true (default is false).
- Update existing items by setting the parameter "updateInsertPriceList": true (default is false).
- Override the validity period of the price list compared to that defined in the file using the parameters "forceBeginDate" and "forceEndDate".
- Update a price list with the same validity period by setting the parameter "updatePriceList": true.
- Override the unit of measure, currency code, or customer code compared to the external file.
This functionality can be managed by also defining the parameter element "addParameters" in the body of the call.
// body content
{
    "addParameters": {
        "forceTypeInUseOrToExpect": "0",
        "insertNewItem": false,
        "updateExistingItem": false,
        "forceBeginDate": "1900-01-01T08:18:28.461Z",
        "forceEndDate": "2099-12-31T08:18:28.461Z",
        "dateUpdate": "2024-08-07T08:18:28.461Z",
        "updateInsertPriceList": true,
        "updatePriceList": false,
        "forceTypeUnitOfMeasure": "1",
        "forceCodCurrency": null,
        "forceCodCustomerSupplier": null
    },
    "isAsyncMode": false,
    "TypeSalePurchase" : "1",
    "CodLayout": "{{CodLayout}}",
    "StreamFileImport":
}
At the end of the import, the response displays the processing result in ImportExportResultDTO, the number of rows imported, and any error notifications.
The supplier price list import can also be executed in asynchronous mode by setting the mandatory parameter "isAsyncMode" to true
{
    "TypeSalePurchase" : "1",
    "isAsyncMode": true,
    "CodLayout": "{{CodLayout}}",
    "StreamFileImport":
 }
In this case, the response displays the guidSession:
{
    "guidSession": "2718c758-7ec2-46a3-8f2a-57faaa0a5ac9",
    "stateProcess": "Inserted",
    "idStateProcess": 0,
    "headProcess": null
}
At this momen, to retrieve the processing result in ImportExportResultDTO, it is necessary to use the IEServiceCO service by making a call of type GET:
webapi_base_url/api/v1/{{scope}}/CO/IEServiceCO/{{guidSession}}?company={{defaultCompany}}
{
    "guidSession": "2718c758-7ec2-46a3-8f2a-57faaa0a5ac9",
    "stateProcess": "Terminate",
    "idStateProcess": 2,
    "headProcess": {
        "guidResult": "4E175429D751488D985891CCCAFA92D8",
        "totRowImpExp": 7,
        "impExpWithErrors": false,
        "rowElab": [
            {
                "typeResult": 1,
                "typeResultDescription": "Information",
                "description": "Importazione terminata.\r\nNumero di righe importate correttamente: 7 \r\nNumero di righe non importate: 0"
            }
        ]
    }
}
Export and Import Customers or Suppliers from External Sources: Service IEImportCO and IEExportCO
The IEExportCO service allows exporting customers or suppliers from TSE, generating a stream file, while the IEImportCO service allows importing customers or suppliers via a file provided by third parties. The supported file formats are Excel and CSV. The export of customers and/or suppliers generates a stream file that can be converted into a CSV or Excel file. Through these services, it is possible to export one or more customers and/or suppliers or import them from a file. By creating a specific layout defined in the ERP and using specific parameters, it is possible to automatically create the related records or update them if they already exist.
The service can be executed in both synchronous and asynchronous modes using the parameter "isAsyncMode".
Import Customers/Suppliers: Service IEImportCO
To perform the import of customers/suppliers from an external file, the following call must be made:
webapi_base_url/api/v1/{{scope}}/CO/IEImportCO/customersupplier?company={{defaultCompany}}
The service retrieves the parameters from ImportParameterDTO and returns in the response, within ImportExportResultDTO, the number of rows imported correctly and the number of rows not imported, along with the corresponding error notifications
ImportParameterDTO
isAsyncMode - mandatory (Import Mode - Synchronous (true) or Asynchronous (false)) CodLayout - mandatory (Tracking Code to Use for the Import) StreamFileImport – mandatory (File to Import in Base64 Format)
ImportExportResultDTO
guidSession - processing guid stateProcess - processing status idStateProcess - ID corresponding to the processing status headProcess: guidResult - Import result guid totRowImpExp- Total number of rows to import impExpWithErrors rowElab - Rows subject to import typeResult - id corresponding to the import result typeResultDescription - information description - description of import notes and any errors
The service only accepts layouts with CodStructureType = 2 (Customer/Supplier Records) and CodStructureSubType = 0. The file to be imported must be converted to Base64 format to be imported by the service.
During the import of customers and/or suppliers, it is also possible to simultaneously:
- create new customers and/or suppliers (present in the file and not present in the ERP) by setting the parameter "insertCustomerSupplier": true (default is false).
- update existing customers and/or suppliers by setting the parameter "updateExistingCustomerSupplier": true (default is false).
- define the import mode (as per ERP) using the parameter "typeImportModeCustomerSupplier" (default is 0, which corresponds to "All Records").
This functionality can be managed by also defining the parameter element "addParameters" in the body of the call:
{
  "addParameters": {
    "typeImportModeCustomerSupplier": "0",
    "insertCustomerSupplier": true,
    "updateExistingCustomerSupplier": true
  },
    "isAsyncMode": false,
    "CodLayout": "{{CodLayout}",
    "StreamFileImport": " "
}
At the end of the import, the response displays the processing result in ImportExportResultDTO, the number of rows imported, and any error notifications.
The import of customers/suppliers can also be executed in asynchronous mode by setting the mandatory parameter "isAsyncMode: true".
{
    "isAsyncMode": true,
    "CodLayout": "{{CodLayout}}",
    "StreamFileImport":
}
In this moment, the response return the guidSession:
{
    "guidSession": "2718c758-7ec2-46a3-8f2a-57faaa0a5ac9",
    "stateProcess": "Inserted",
    "idStateProcess": 0,
    "headProcess": null
}
To retrieve the processing result in ImportExportResultDTO, it is necessary to use the IEServiceCO service by making a GET call and indicating the guidSession from the previous response.
webapi_base_url/api/v1/{{scope}}/CO/IEServiceCO/{{guidSession}}?company={{defaultCompany}}
{
    "guidSession": "2718c758-7ec2-46a3-8f2a-57faaa0a5ac9",
    "stateProcess": "Terminate",
    "idStateProcess": 2,
    "headProcess": {
        "guidResult": "4E175429D751488D985891CCCAFA92D8",
        "totRowImpExp": 7,
        "impExpWithErrors": false,
        "rowElab": [
            {
                "typeResult": 1,
                "typeResultDescription": "Information",
                "description": "Importazione terminata.\r\nNumero di righe importate correttamente: 7 \r\nNumero di righe non importate: 0"
            }
        ]
    }
}
Export Customers/Suppliers: Service IEExportCO
To export customers/suppliers and generate a Streamfile, the following call must be made:
webapi_base_url/api/v1/{{scope}}/CO/IEExportCO/customersupplier?company={{defaultCompany}}
In the body of the request, you must specify the tracking code to use (previously created via the interface). You need to define whether the export is performed in synchronous or asynchronous mode, and it is also possible to define any additional parameters, as provided by the interface.
{
  "addParameters": {
    "selectionValidityGeneralMasterData": "0",
    "referenceValidDate": "2024-11-11T08:18:28.461Z"
  },
    "isAsyncMode": false,
    "CodLayout": "{{CodLayout}}"
}
With the parameter "selectionValidityGeneralMasterData", you can choose to export all valid master data, only those valid on the system date, or only those valid from a specific date defined in the next parameter "referenceValidDate".
In the body of the response, any error messages are reported, and the streamfile is generated in 64-bit format, which must be converted by the user
Use of Filters As per the interface, it is also possible to apply extraction filters using the Search function. In the example below, all valid master data is exported, and the extraction criterion 'tipocf' is used, so all supplier master data is exported.
{
    "addParameters": {
        "selectionValidityGeneralMasterData": "1"
    },
    "isAsyncMode": false,
    "CodLayout": "{{CodLayoutClifor}}",
    "searchFilter": {
        "filters": {
            "operator": 0,
            "items": [
                {
                    "operator": 0,
                    "comparer": 0,
                    "propertyName": "tipocf",
                    "value": "1"
                }
            ]
        }
    }
}
NOTE: If the user wants to extract data according to a criterion not managed by the Search, it is reminded that an additional criterion can be defined in the current track, using the 'Import Conditions' in case of import or the 'Export Conditions' in case of export. Choose the Advanced Mode and specify the criterion using an SQL statement.
For example, if you want to export only customers belonging to the Area ITA code and the Zone NOR code, the SQL statement is:
[Codice_area] = 'ITA' AND [Codice_zona] = 'NOR'
In this case, the track must include the area code and zone code among the exportable fields.
Export and Import item master data from external sources: Services IEImportWH and IEExportWH
The IEExportWH service allows exporting item master data from TSE, generating a streamfile, while the IEImportWH service allows importing item master data through files provided by third parties. The supported file formats are Excel and CSV.
Exporting item master data generates a streamfile that can be converted into a CSV or Excel file.
Through these services, it is possible to export one or more items or import them from a file. By creating a specific layout defined on the ERP and using specific parameters, it is possible to automatically create the related item master data or update them if they already exist.
The service can be executed in both synchronous and asynchronous modes, using the parameter 'isAsyncMode'.
Import item master data
To perform the import of item master data from an external file, the following call must be made:
webapi_base_url/api/v1/{{scope}}/WH/IEImportWH/item?company={{defaultCompany}}
The service retrieves the parameters from ImportParameterDTO and returns in the response in ImportExportResultDTO the number of rows successfully imported and the number of rows not imported, along with the corresponding error report.
ImportParameterDTO
isAsyncMode - not mandatory (import mode - synchronous (true) or asynchronous (false)) CodLayout - mandatory (Code of the layout to be used for the import) StreamFileImport – mandatory (File to be imported in Base64 format)
ImportExportResultDTO
guidSessione - GUID of the processing stateProcess - state of the processing idStateProcess - ID corresponding to the state of the processing headProcess: guidResult - GUID of the import result totRowImpExp- total number of rows to be imported impExpWithErrors rowElab - rows subject to import typeResult - ID corresponding to the import result typeResultDescription - information description - description of import notes and any errors
The service only accepts layouts with CodStructureType = 1 (Item Master Data) and CodStructureSubType = 0. The file to be imported must be converted to Base64 format to be imported through the service.
During the import of item master data, it is also possible to simultaneously:
- create new item master data (present in the file and not present in the ERP) by setting the parameter
insertNewItem: true (default is false); - update existing item master data by setting the parameter
updateExistingItem: true (default is false); - create new price lists linked to the imported item master data (as per ERP) through the parameter
insertNewPriceList(default is false); - define the start date and end date of validity (if not defined, the system date is considered for the start date of validity, while the end date of validity is considered as 31-12-2099).
This functionality can be managed by also defining the parameter element in the body of the call addParameters:
{
  "addParameters": {
    "insertNewItem": true,
    "updateExistingItem": true,
    "insertNewPriceList": true,
    "beginDatePriceList": "2025-01-01T13:39:23.654Z",
    "endDatePriceList": "2025-01-31T13:39:23.654Z"
  },
    "isAsyncMode": false,
    "CodLayout": "{{CodLayout}",
    "StreamFileImport": " "
}
At the end of the import, the response displays in ImportExportResultDTO the result of the processing, the number of rows imported, and any error reports.
The import of item master data can also be executed in asynchronous mode by setting the mandatory parameter "isAsyncMode: true".
{
    "isAsyncMode": true,
    "CodLayout": "{{CodLayout}}",
    "StreamFileImport":
}
In this case, the response displays the guidSession:
{
    "guidSession": "1949fcab-3030-43a6-b363-dab3af2f91cf",
    "stateProcess": "Inserted",
    "idStateProcess": 0,
    "headProcess": null,
    "streamFileExport": null
}
To retrieve the processing result in ImportExportResultDTO, it is necessary to use the IEServiceCO service by making a GET call and indicating the guidSession from the previous response:
webapi_base_url/api/v1/{{scope}}/CO/IEServiceCO/{{guidSession}}?company={{defaultCompany}}
{
    "guidSession": "1949fcab-3030-43a6-b363-dab3af2f91cf",
    "stateProcess": "Terminate",
    "idStateProcess": 2,
    "headProcess": {
        "guidResult": "FC114860E4234F68A37F56C130504E64",
        "totRowImpExp": 3,
        "impExpWithErrors": false,
        "rowElab": [
            {
                "typeResult": 1,
                "typeResultDescription": "Information",
                "description": "Importazione terminata.\r\nNumero di righe importate correttamente: 3 \r\nNumero di righe non importate: 0",
                "isDone": false,
                "isImportance": true,
                "isError": false,
                "isWarning": false,
                "isInformation": true,
                "isCreate": false,
                "isUpdate": false,
                "isDelete": false
            }
        ]
    },
}
Export item master data
To perform the export of item master data, generating a Streamfile, the following call must be made:
webapi_base_url/api/v1/{{scope}}/WH/IEExportWH/item?company={{defaultCompany}}
In the body of the request, the code of the layout to be used (previously created via Interface) must be indicated, and it must be defined whether the export is performed in synchronous or asynchronous mode. It is also possible to define any additional parameters, as provided by the Interface.
{
  "addParameters": {
    "selectItemsToExtracted": "0",
    "updateExtractedItem": false,
    "priceListReferenceDate": "2025-03-14T09:03:36.101Z",
    "storageWHCode": "00",
    "extractGeneratedVariants": false
  },
    "isAsyncMode": false,
    "CodLayout": "{{CodLayout}}"
}
With the parameter "selectItemsToExtracted" (which corresponds to the parameter "Items to be extracted" present in the Interface), it is possible to choose whether to export All items (= value 0 which corresponds to the default) or only those that have changed at the master data level (= value 1) or only those that have undergone price list changes (= value 2) or all item master data that have undergone any change (= value 3).
The parameter "priceListReferenceDate" is the price list reference date, while the parameter "storageWHCode" corresponds to the stock warehouse where the item master data to be exported are located.
With the parameter "extractGeneratedVariants" set to true, it is possible to also export variant options for item master data that manage variants.
With the parameter "updateExtractedItem", when exporting item master data, if this parameter is set to "true", the change flag is updated for each exported item code. A practical example: all items are exported, the parameter is set to "true", some changes are made to the master data or price lists of some items, and if a new data export is performed at this point, setting "selectItemsToExtracted=3", the service will only export the item master data that have changed compared to the first export previously performed.
In the body of the response, any error messages are reported, and the streamfile is generated in 64-bit format, which must be converted by the user.
Use of Filters As per the interface, it is also possible to apply extraction filters using the Search function. In the example below, all item master data are exported, and the extraction criterion used is the propertyName 'um1' with the value "PZ", so all item master data with the main unit of measure PZ are exported.
{
    "addParameters": {
        "selectItemsToExtracted": "0",
        "updateExtractedItem": false,
        "priceListReferenceDate": "2024-01-01T09:03:36.101Z",
        "storageWHCode": "00",
        "extractGeneratedVariants": false
    },
    "isAsyncMode": false,
    "codLayout": "{{CodLayout}}",
    "SearchFilter": {
        "filters": {
            "operator": 0,
            "items": [
                {
                    "operator": 0,
                    "propertyName": "um1",
                    "comparer": 0,
                    "value": "PZ"
                }
            ]
        }
    }
}
NOTE: If the user wants to extract data according to a criterion not managed by the Search, it is reminded that an additional criterion can be defined in the layout in use, through the 'Import Conditions' in case of import or the 'Export Conditions' in case of export. In this case, the Advanced Mode is chosen, and the criterion is specified using an SQL statement.
In this case, the layout must include the code used as the criterion among the exportable fields.
Export and Import Documents from External Source: IEImportMG and IEExportoMG Service
IEExportMG Service
The IEExportMG service allows you to export documents from TSE by generating a stream file, while the IEImportMG service enables you to import documents via files provided by third parties. The supported file formats are Excel and CSV.
The IEExportMG service generates a stream file (in 64-bit format) that can be converted into a CSV or Excel file. Through this service, it is possible to export all documents, only those "to be extracted" (not yet extracted), or one or more specific documents by applying search filters.
IEImportMG Service
The IEImportMG service allows you to import multiple documents from an external file, either with a specific document code or with a different document code from the one present in the file. Using additional parameters, you can create/update customers/suppliers or item master data and some related tables.
To use these services, it is necessary to create a specific layout defined in the ERP. Both services only accept layouts with CodStructureType = 4 (Documents, items, customers/suppliers) and CodStructureSubType = 0.
Both services can be executed in either synchronous or asynchronous mode using the "isAsyncMode" parameter.
Import Documents
To execute the import of documents from an external file, the following call must be made:
webapi_base_url/api/v1/{{scope}}/MG/IEImportMG/document?company={{defaultCompany}}
The service retrieves parameters from ImportParameterDTO and returns in the response ImportExportResultDTO the number of rows successfully imported and the number of rows not imported, along with the corresponding error report.
ImportParameterDTO
isAsyncMode - mandatory (import mode - synchronous (true) or asynchronous (false)) CodLayout - mandatory (Code of the layout to be used for the import) StreamFileImport – mandatory (File to be imported in Base64 format)
ImportExportResultDTO
guidSessione - GUID of the processing stateProcess - state of the processing idStateProcess - ID corresponding to the state of the processing headProcess: guidResult - GUID of the import result totRowImpExp - total number of rows to be imported impExpWithErrors rowElab - rows subject to import typeResult - ID corresponding to the import result typeResultDescription - information description - description of import notes and any errors
The file to be imported must be converted to Base64 format for import.
During the import of documents, it is also possible to simultaneously:
- Define a specific document code to use for the import via the "documentCode" parameter. All documents in the external file will be imported with the document code defined in the body (and obviously active for the working company);
- Specify the action to take if the document being imported already exists in the ERP via the "selectionActionDocumentExist" parameter (default is 4 - Insert with the same number);
- Create new customers or suppliers, depending on the type of document being imported (present in the file and not present in the ERP), via the "insertNewCustomerSupplier" parameter (default is true);
- Update existing customer or supplier master data via the "updateExistingCustomerSupplier" parameter (default is false);
- Create new item master data (present in the file and not present in the ERP) by setting the "insertNewItem" parameter to true (default is true);
- Update existing item master data by setting the "updateExistingItem" parameter to true (default is false);
- Insert new data for some tables related to customers/suppliers or item master data, if not present in the ERP, via the "insertDataForNotExistingTables" parameter (default is true);
For customers/suppliers: Banks and Agencies, Agents, Payment Conditions, Carriers, Goods Recipient. For item master data: Families, Subfamilies, Groups, Subgroups.
These functionalities can be managed by defining the addParameters element in the body of the call:
{
  "addParameters": {
    "documentCode": "CLI-FATIMM",
    "selectionActionDocumentExist": "4",
    "insertNewCustomerSupplier": true,
    "updateExistingCustomerSupplier": false,
    "insertNewItem": true,
    "updateExistingItem": false,
    "insertDataForNotExistingTables": true
  },
    "isAsyncMode": false,
    "CodLayout": "{{CodLayout}",
    "StreamFileImport": " "
}
At the end of the import, the response displays in ImportExportResultDTO the result of the processing, the number of rows imported, and any error reports.
For a correct import of documents from a CSV file, the record layout used can be formed by a single row of "Header and body data group" Row Type or it can contain two rows: one with "Header data group" Row Type, where all the document header fields are defined, and a second with "Body" Row Type, where all the document row fields to be managed are indicated.
In both cases, for the "Header data group" Row Type, a FILLER field with Fixed Transcoding and Value=T must also be defined to identify it as "DocumentHeader", and for the "Body" Row Type, a FILLER field with Fixed Transcoding and Value=R must be defined to identify it as "DocumentRow".
It is also noted that, for a correct data import, it is necessary to appropriately define the Import Conditions, i.e., in the "Basic Mode" layout, specify the corresponding positions of the aforementioned FILLER fields.
For a correct import of documents from an EXCEL file, the record layout used can be formed by a single row of "Header and body data group" Row Type. As previously indicated, a FILLER field for the document header and a FILLER field for the document row must be defined.
In this case, for a correct data import, it is necessary to define the Import Conditions in the "Advanced Mode" layout with the following SQL instruction:
(PRECEDENTE [Numero_documento] <> [Numero_documento] )
Document import can also be executed in asynchronous mode by setting the "isAsyncMode: true" parameter among the mandatory parameters.
{
    "isAsyncMode": true,
    "CodLayout": "{{CodLayout}}",
    "StreamFileImport":
}
In this case, the response displays the guidSession:
{
    "guidSession": "1949fcab-3030-43a6-b363-dab3af2f91cf",
    "stateProcess": "Inserted",
    "idStateProcess": 0,
    "headProcess": null,
    "streamFileExport": null
}
To retrieve the processing result in ImportExportResultDTO, it is necessary to use the IEServiceCO service by making a GET call and indicating the guidSession from the previous response:
webapi_base_url/api/v1/{{scope}}/CO/IEServiceCO/{{guidSession}}?company={{defaultCompany}}
webapi_base_url/api/v1/{{scope}}/CO/IEServiceCO/{{guidSession}}?company={{defaultCompany}}
{
    "guidSession": "1949fcab-3030-43a6-b363-dab3af2f91cf",
    "stateProcess": "Terminate",
    "idStateProcess": 2,
    "headProcess": {
        "guidResult": "FC114860E4234F68A37F56C130504E64",
        "totRowImpExp": 3,
        "impExpWithErrors": false,
        "rowElab": [
            {
                "typeResult": 1,
                "typeResultDescription": "Information",
                "description": "Importazione terminata.\r\nNumero di righe importate correttamente: 3 \r\nNumero di righe non importate: 0",
                "isDone": false,
                "isImportance": true,
                "isError": false,
                "isWarning": false,
                "isInformation": true,
                "isCreate": false,
                "isUpdate": false,
                "isDelete": false
            }
        ]
    },
}
Export Documents
To execute the export of documents by generating a Streamfile, the following call must be made:
webapi_base_url/api/v1/{{scope}}/MG/IEExportMG/document?company={{defaultCompany}}
In the body of the request, the code of the layout to be used (previously created via the Interface) must be indicated, and it must be defined whether the export is performed in synchronous or asynchronous mode. It is also possible to define any additional parameters as provided by the Interface.
{
  "addParameters": {
    "selectDocToExtracted": "0",
    "updateExtractedDocuments": true
  },
    "isAsyncMode": false,
    "CodLayout": "{{CodLayout}}"
}
With the selectDocToExtracted parameter (which corresponds to the "Documenti da estrarre" parameter in the Interface), it is possible to choose whether to export "All" documents (= value 0, which corresponds to the default value), only those "To be extracted" (= value 1), or only those "Extracted" (= value 2).
When executing the export of documents, if the updateExtractedDocuments parameter is set to "true", all documents involved in the export are marked as "Extracted" using a specific indicator. This way, in a subsequent export, if the "selectDocToExtracted" parameter is set to 1, only new documents will be retrieved, or if the "selectDocToExtracted" parameter is set to 2, only previously extracted documents will be retrieved.
In the body of the response, any error messages are reported, and a 64-bit format stream file is generated, which must be converted by the user.
Use of Filters As per the interface, it is also possible to apply extraction filters using the Search function. In the example below, all documents with a document date equal to 15-04-2025 are exported.
{
    "addParameters": {
        "selectDocToExtracted": "0",
        "updateExtractedDocuments": true
    },
    "isAsyncMode": false,
    "CodLayout": "WAC_DOCUM",
    "searchFilter": {
        "filters": {
            "operator": 0,
            "items": [
                {
                    "operator": 0,
                    "propertyName": "datadoc",
                    "comparer": 0,
                    "value": "2025-04-15"
                }
            ]
        }
    }
}
NOTE:
For a correct export of documents,, it is necessary to define the following SQL instruction in Advanced Mode in the export conditions of the record layout used:
"(PRECEDENTE [Numero_documento] <> [Numero_documento] )"
Analytical Accounting
Insertion of an Analytical Accounting Entry
To register an Analytical Accounting Entry, a POST request must be used. Here's a practical example:
{{webapi_base_url}}/api/v1/{{scope}}/CI/CostAccountingEntryCI?company={{defaultCompany}}
{
    "datareg": "{{datareg}}",
    "numdoc": "{{numdoc}}",
    "sezdoc": "{{sezdoc}}",
    "accountingReasonCodeCI": {
        "codCaus": "{{codCaus}}"
    },
    "costAccountingEntryDetailCI": [
        {
            "sedeCg31": "{{sedeCg31_1}}",
            "codPdcPc01": "{{codPdcPc01_1}}",
            "codVdsPc01": "{{codVdsPc01_1}}",
            "commessaPd25": "{{commessaPd25_1}}",
            "contoPc03": "{{contoPc03_1}}",
            "dadatacomp": "{{dadatacomp_1}}",
            "descragg": "{{descragg_1}}",
            "dittaCg18": "{{dittaCg18_1}}",
            "importo": "{{importo_1}}",
            "progRiga": "{{progRiga_1}}",
            "vdsPc03": "{{vdsPc03_1}}",
            "officeCO": {
                "codice": "{{officeCO_codice_1}}"
            }
        }
    ],
    "customerSupplierCO": "{{customerSupplierCO}}",
    "ifrsTypeCO": "{{ifrsTypeCO}}",
    "movementTypeCO": {
        "codice": "{{movementTypeCO_codice}}"
    },
    "officeCO": {
        "codice": "{{officeCO_codice}}"
    }
}
Example of Response:
{
    {
    "totalAmount": 0.0,
    "codCausCi03": "CO99",
    "descrcaus": "Test da WebAPI",
    "datadoc": null,
    "datareg": "2025-09-01T00:00:00",
    "descragg": null,
    "dittaCg18": 1000.0,
    "flgDocbis": 0.0,
    "flgMovvar": 1.0,
    "guid": "79e4ae72-c79b-4f88-9223-9bac1df8afec",
    "indProvenienza": 1,
    "numdoc": 2.0,
    "numdocorig": null,
    "numregCo99": "202500001191",
    "sezdoc": "HR",
    "tipodoc": 66.0,
    "accountingReasonCodeCI": {
        "causcollrifCi03": null,
        "flgAutomatico": 0.0,
        "flgCostomanod": 0.0,
        "idEntityWithDescriptions": 903,
        "idprov": 37.0,
        "indCorrmag": 0.0,
        "indMovcostipers": 0.0,
        "indPropcosto": 0.0,
        "indProvcosto": 2.0,
        "indStaperCi04": 0.0,
        "indTipocosric": 0.0,
        "indTipocostomag": 0.0,
        "indTipopsBu01": null,
        "modelloCi04": null,
        "codCaus": "CO99",
        "codCauscoll": null,
        "descr": "Test da WebAPI",
        "flgInvsegno": 0.0,
        "flgNumautom": 0.0,
        "flgObblcommessa": 0.0,
        "flgObblcompetenza": 0.0,
        "flgObblprogetto": 0.0,
        "flgRiccommessa": 0.0,
        "flgRiccompetenza": 0.0,
        "flgRicprogetto": 0.0,
        "flgRilprog": 0.0,
        "flgTipomovdaorigine": 0,
        "idmediaCg99": null,
        "indOperazione": 0.0,
        "indQuadratura": 99.0,
        "indRegoridest": 0,
        "indRegvalqta": 0,
        "indRicclifor": 0.0,
        "indRichcorrareaamm": 0.0,
        "indTipomov": 1,
        "indTipomovdati": 0.0,
        "sottotipopsBu01": null,
        "extensionData": [],
        "additionalData": {},
        "pluginData": {}
    },
    "costAccountingEntryDetailCI": [
        {
            "sedeCg31": 0.0,
            "adatacomp": null,
            "codDipPd06": null,
            "codiceCgc0": null,
            "codPdcPc01": 81.0,
            "codRepPd07": null,
            "codVdsPc01": 80.0,
            "commessaPd25": null,
            "contoPc03": "00001          ",
            "dadatacomp": null,
            "descragg": null,
            "dittaCg18": 1000.0,
            "guid": "f948750c-d3a8-4556-9496-8eb6f4d0a5bc",
            "importo": 1000.00,
            "numregCo99": "202500001191",
            "progettoPd68": null,
            "progRiga": 1.0,
            "qta": null,
            "rigacontCg42": null,
            "scommessaPd25": null,
            "sprogettoPd69": null,
            "vdsPc03": "5800050115     ",
            "officeCO": {
                "cap": "00600",
                "citta": "Roma",
                "codice": 0.0,
                "dittaCg18": 1000.0,
                "idmediaCg99": null,
                "indDimcentrocomm": 0.0,
                "indIrizzo": "Default",
                "numerorea": null,
                "progRea": null,
                "prov": "RM",
                "rowversion": "AAAAAAAg678=",
                "extensionData": [],
                "additionalData": {},
                "pluginData": {}
            },
            "extensionData": [],
            "additionalData": {},
            "pluginData": {}
        }
    ],
    "customerSupplierCO": null,
    "ifrsTypeCO": null,
    "movementTypeCO": {
        "codice": 1,
        "descr": null,
        "descrbreve": "Dc",
        "descrmedia": "Da Consol.",
        "flgBilanci": 1,
        "flgBilancicons": 1,
        "flgCanrevoke": 1,
        "flgCoan": 1,
        "flgContrsaldi": 1,
        "flgDoc": 1,
        "flgEc": 1,
        "flgElabiva": 1,
        "flgHyperion": 1,
        "flgMovcont": 1,
        "flgMoviva": 1,
        "flgPartitari": 1,
        "flgPf": 1,
        "flgQuerypn": 1,
        "indAcconti": 2,
        "indCambiali": 2,
        "indChiuseff": 2,
        "indConsolidamento": 1,
        "indDatabilanci": 0,
        "indEcportaper": 2,
        "indEcportchius": 2,
        "indIncassobf": 2,
        "indInsoluti": 2,
        "indProforma": 0,
        "indRaggr": 0,
        "indRatrisc": 2,
        "indRettifica": 0,
        "indSimulbilanci": 0,
        "indTipoifrs": 0,
        "extensionData": [],
        "additionalData": {},
        "pluginData": {}
    },
    "officeCO": null,
    "extensionData": [],
    "additionalData": {},
    "pluginData": {}
}
}
Insertion of Analytical Accounting Reason Codes
To register an Analytical Accounting reason code, a POST request must be used. Here's a practical example:
{{webapi_base_url}}/api/v1/{{scope}}/CI/AccountingReasonCodeCI?company={{defaultCompany}}
{
  "codCaus": "{{codCausCoAn}}",
  "descr": "Test da WebAPI"
 }
Example of Response:
  {
    "causcollrifCi03": null,
    "flgAutomatico": 0.0,
    "flgCostomanod": 0.0,
    "idEntityWithDescriptions": 903,
    "idprov": 38.0,
    "indCorrmag": 0.0,
    "indMovcostipers": 0.0,
    "indPropcosto": 0.0,
    "indProvcosto": 2.0,
    "indStaperCi04": 0.0,
    "indTipocosric": 0.0,
    "indTipocostomag": 0.0,
    "indTipopsBu01": null,
    "modelloCi04": null,
    "codCaus": "12",
    "codCauscoll": null,
    "descr": "Test da WebAPI",
    "flgInvsegno": 0.0,
    "flgNumautom": 0.0,
    "flgObblcommessa": 0.0,
    "flgObblcompetenza": 0.0,
    "flgObblprogetto": 0.0,
    "flgRiccommessa": 0.0,
    "flgRiccompetenza": 0.0,
    "flgRicprogetto": 0.0,
    "flgRilprog": 0.0,
    "flgTipomovdaorigine": 0,
    "idmediaCg99": null,
    "indOperazione": 0.0,
    "indQuadratura": 99.0,
    "indRegoridest": 0,
    "indRegvalqta": 0,
    "indRicclifor": 0.0,
    "indRichcorrareaamm": 0.0,
    "indTipomov": 1,
    "indTipomovdati": 0.0,
    "sottotipopsBu01": null,
    "extensionData": [],
    "additionalData": {},
    "pluginData": {}

 }
Activation of General Accounting
To activate the General Accounting (COGE) accounts used in CoAN, a POST request must be used. Here's a practical example:
{{webapi_base_url}}/api/v2/{{scope}}/CI/ActiveAccountCI?company={{defaultCompany}}
{
  "accountCode": "{{accountCodeCI}}",
  "companyCode": {{defaultCompany}},
  "accountGroupCode": "{{CodeaccountGroup}}"
}
Example of response:
{
    "accountCode": "0300050099",
    "accountGroupCode": 80.0,
    "companyCode": 1000.0,
    "extensionData": [],
    "additionalData": {},
    "pluginData": {}
}
Correlation of Reason Codes with General Accounting
To insert the correlation between Analytical Accounting and General Accounting reason codes, a POST request must be used. Here's a practical example:
{{webapi_base_url}}/api/v2/{{scope}}/CI/CorrelationAccountingReasonCodeCI?company={{defaultCompany}}
{
    "accountingReasonCode": "{{accountingReasonCode}}",
    "analyticalAccountingReasonCode": "{{analyticalAccountingReasonCode}}",
    "companyCode": {{defaultCompany}},
    "isDefault": 0
}
Example of response:
{
    "accountingReasonCode": "1",
    "analyticalAccountingReasonCode": "CO01",
    "companyCode": 1000.0,
    "isDefault": 0.0,
    "extensionData": [],
    "additionalData": {},
    "pluginData": {}
}
Sectional Proposal Configuration
To insert the configuration of sectional proposals, a POST request must be used. Here's a practical example:
{{webapi_base_url}}/api/v1/{{scope}}/CI/SectionalProposalCI?company={{defaultCompany}}
{
    "analyticalAccountingReasonCode": "{{analyticalAccountingReasonCode}}",
    "companyCode": {{defaultCompany}},
    "sectionalCode": "HR"
}
Example of response:
{
    "analyticalAccountingReasonCode": "CO01",
    "companyCode": 1000.0,
    "sectionalCode": "HR",
    "extensionData": [],
    "additionalData": {},
    "pluginData": {}
}
Configuration of Cost/Revenue Types
To insert the configuration of cost/revenue types, a POST request must be used. Here's a practical example:
{{webapi_base_url}}/api/v1/{{scope}}/CI/CostNatureCI?company={{defaultCompany}}
{
    "costNatureCode": 6,
    "costNatureDescription": "Ricavo WebAPI",
    "costRevenueType": 2,
    "hyperMediaId": null,
    "printOrder": 5,
    "extensionData": [],
    "additionalData": {},
    "pluginData": {}
}
Example of response:
{
    "costNatureCode": 6.0,
    "costNatureDescription": "Ricavo WebAPI",
    "costRevenueType": 2.0,
    "hyperMediaId": null,
    "printOrder": 5.0,
    "extensionData": [],
    "additionalData": {},
    "pluginData": {}
}
Management of Analytical Accounting Accounts
To insert Analytical Accounting accounts, a POST request must be used. Here's a practical example:
{{webapi_base_url}}/api/v1/{{scope}}/CI/AccountCI?company={{defaultCompany}}
{
    "accountCode": "{{accountCode}}",
    "description": "conto piano 80",
    "accountGroupCode": {{accountGroupCode}},
    "costNatureCode": {{codNature}},
    "costSourceType": 0
}
Example of response:
{
    "accountCode": "58000",
    "accountGroupCode": 81.0,
    "costNatureCode": null,
    "costSourceType": 0.0,
    "description": "conto piano 80",
    "hyperMediaId": null,
    "extensionData": [],
    "additionalData": {},
    "pluginData": {}
}
General Accounting
General Ledger Entries V2
In this section, we illustrate the use of WebAPI V2 for managing accounting entries through the GLEntryFI and InstalmentFI services. These services allow you to record and manage journal entries, both VAT and non-VAT, with particular focus on the creation of payment schedules. Here is an example of inserting a Customer Invoice:
{{webapi_base_url}}/api/V2/{{scope}}/fi/glentryfi?company={{defaultCompany}}
{
    {
    "accountingReasonCode": "1",
    "Description": "Fattura di vendita",
    "amount": 122.00,
    "currencyCode": "EURO",
    "customerSupplierId": 4,
    "documentType": 1.0,
    "registrationDate": "2025-12-24",
    "documentDate": "2025-12-24",
    "sectionalCode": "00",
    "documentNumber": 0,
    "rows": [
        {
            "operationType": 1,
            "accountId": 3257,
            "customerSupplierId": 4,
            "amount": 122.00,
            "signType": 1
        },
        {
            "operationType": 3,
            "accountId": 3686,
            "amount": 100.00,
            "signType": 2,
            "vatRowNumber": 1.0
        },
        {
            "operationType": 2,
            "accountId": 3566,
            "amount": 22.00,
            "signType": 2
        }
    ],
    "vatRows": [
        {
            "rowNumber": 1.0,
            "accountId": 3686,
            "taxableAmount": 100.00,
            "taxAmount": 22.00,
            "vatCode": "22",
            //"nonDeductibilityVatType" : 1,
            "vatAccountingReasonCode": 0.0
        }
    ]
}
Example of inserting an Accounting Transfer:
{{webapi_base_url}}/api/V2/{{scope}}/fi/glentryfi?company={{defaultCompany}}
{
    "accountingReasonCode": "109",
   // "registrationDate": "2024-10-21",
    "Description": "Giroconto contabile",
    "amount": 9.00,
    "sectionalCode": "00",
    "currencyCode": "EURO",
    "movementType": 0,
    "officeCode": 0.0,
    "rows": [
        {
            "accountId": 3399,
            "amount": 10.00,
            "signType": 1,
            "operationType": 28
        },
        {
            "accountId": 3382,
            "amount": 10.00,
            "signType": 2,
            "officeCode": 1.0,
            "currencyCode": "EURO"
        }
    ],
    "vatRows": []
}
Insert Instalment
Service for managing due dates and payment plans, linked to the accounting entries recorded with GLEntriFI. To establish the association between the payment schedules and the accounting entry, you must provide the registrationNumber parameter generated by the GLEntriFI service at the time of registration. Example of inserting a payment schedule:
{{webapi_base_url}}/api/V2/{{scope}}/FI/InstalmentFI?company={{defaultCompany}}
{
    "acceptanceType": 0,
    "accountId": 3257,
    "accountingReasonCode": "1",
    "accountingRowNumber": 1.0,
    "accountStatementProgressive": 0.0,
    "accountType": 1.0,
    "amount": 61.00,
    "art62GoodsType": 0,
    "billEffectNumber": 82.0,
    "billEffectStatusTransactionType": 0.0,
    "billEffectType": 13.0,
    "billPresentationType": 0.0,
    "billProgressive": 2.0, // progressivo scadenza
    "billStatusType": 0.0,
    "collectionFees": 0.0,
    "commissionSettlementType": 0.0,
    "companyCode": 1000,
    "currencyAmount": 0.00,
    "currencyCode": "EURO",
    "currencyCollectionFees": 0.00,
    "currencyDocumentTotal": 0.00,
    "currencyOriginWithholdingsAmount": 0.00,
    "currencyResidualAmount": 0.00,
    "currencyResidualAmountExcludingEstimatedEntries": 0.00,
    "currencyVatAmount": 0.00,
    "currencyWithholdingsAmount": 0.00,
    "customerSupplierId": 4,
    "description": "Fattura di vendita",
    "documentDate": "2025-12-24T00:00:00",
    "documentNumber": "19",
    "documentTotal": 122.00,
    "dueDate": "2026-02-28T00:00:00",
    "entryNumber": 9.0,
    "entrySectionalCode": "00",
    "entryYear": 2025.0,
    "exchangeRate": 0.000000,
    "exchangeRateAdjustmentOnAccount": 0.00,
    "exchangeRateDate": "2025-12-24T00:00:00",
    "instalmentNumber": 1.0,
    "lastChangeDate": "2025-12-02T14:58:12.063",
    "movementType": 0.0,
    "originDueDate": "2026-02-28T00:00:00",
    "originWithholdingsAmount": 0.00,
    "paymentTermId": 56,
    "progressiveNumber": 19.0,
    "registrationDate": "2025-12-24T00:00:00",
    "registrationNumber": "202500002642",
    "residualAmount": 61.00,
    "residualAmountExcludingEstimatedEntries": 61.00,
    "returnExpenseMgmtType": 0.0,
    "returnFees": 0.00,
    "returnFeesChargedByBank": 0.00,
    "sectionalCode": "00",
    "stampDutyAmount": 0.0,
    "stampDutyCurrencyAmount": 0.00,
    "startingDueDate": "2025-12-24T00:00:00",
    "totalInstalments": 2.0,
    "vatAmount": 11.00
}
Framework
Dlevel e Dlevelkey
Through the DlevelEntityName service, it is possible to retrieve a list of information related to correlated entities, starting from a specific DTO, in order to understand the names of the Entities (internalNameDeserialization and externalNameDeserialization) to then populate the required dlevel property in all standard GET requests of the WebApi.
The deserialization level is a syntax that describes which branches of the graph that constitutes the aggregate should be loaded in a read operation. Syntax:
[] square brackets identify internal relationships curly brackets identify an external relationship
- identifies all relationship names in that context For example, given a 'DTO name: DocumentoTestataMGDTO, the following call can be made:
GET {{webapi_base_url}}/api/v1/{{scope}}/FW/DlevelEntityName/DocumentoTestataMGDTO?company={{defaultCompany}}
which will return the following information in the response::
[
    {
        "internalNameDeserialization": "DocumentoDatiAccompagnamentoMG",
        "externalNameDeserialization": null,
        "relatedDTOEntityName": "DocumentoDatiAccompagnamentoMGDTO",
        "relatedDTOPropertyName": "DocumentoDatiAccompagnamentoMG"
    },
    {
        "internalNameDeserialization": "RigheDocumento",
        "externalNameDeserialization": null,
        "relatedDTOEntityName": "DocumentoRigaMGDTO",
        "relatedDTOPropertyName": "Righe"
    },
    {
        "internalNameDeserialization": "DocumentoTestataAgentiMG",
        "externalNameDeserialization": null,
        "relatedDTOEntityName": "DocumentoTestataAgentiMGDTO",
        "relatedDTOPropertyName": "DocumentoTestataAgentiMG"
    },
]
If you want to view information related to the internal entity 'RigheDocumento', you execute the same call indicating the EntityDTOName: DocumentoRigaMGDTO, as shown below::
GET {{webapi_base_url}}/api/v1/{{scope}}/FW/DlevelEntityName/DocumentoRigaMGDTO?company={{defaultCompany}}
which will return in the response all the 'internalNameDeserialization' and 'externalNameDeserialization' for the specified DTO:
[
    {
        "internalNameDeserialization": "DocumentoCorpoCOINMG",
        "externalNameDeserialization": null,
        "relatedDTOEntityName": "DocumentoRigaCOINMGDTO",
        "relatedDTOPropertyName": "DocumentoRigaCOINMG"
    },
    {
        "internalNameDeserialization": null,
        "externalNameDeserialization": "CodIvaCO",
        "relatedDTOEntityName": "VatCodeCODTO",
        "relatedDTOPropertyName": "CodIva"
    },
    {
        "internalNameDeserialization": "DocumentoCorpoProgettiMG",
        "externalNameDeserialization": null,
        "relatedDTOEntityName": "DocumentoRigaProgettiMGDTO",
        "relatedDTOPropertyName": "DocumentoRigaProgettiMG"
    },
    {
        "internalNameDeserialization": "RigaRiferimenti",
        "externalNameDeserialization": null,
        "relatedDTOEntityName": "DocumentoRigaRiferimentoMGDTO",
        "relatedDTOPropertyName": "RigaRiferimenti"
    },
    {
        "internalNameDeserialization": null,
        "externalNameDeserialization": "OfficeCO",
        "relatedDTOEntityName": "OfficeCODTO",
        "relatedDTOPropertyName": "OfficeCO"
    }
]
At this point, you can execute the GET call for a specific document and retrieve only the desired information, limiting the GET call to:
the external entity VAT codes from the result DocumentoRigaMGDTO ("externalNameDeserialization": "CodIvaCO")
the internal entity projects from the result DocumentoRigaMGDTO ("internalNameDeserialization": "DocumentoCorpoProgettiMG")
the external entity CustomerSupplier from the result DocumentoTestataMGDTO ("externalNameDeserialization": "CustomerSupplierMG")
the external entity CompanyDocumentMasterData from the result DocumentoTestataMGDTO ("externalNameDeserialization": "CompanyDocumentMasterDataMG")
In this case, the correct syntax translates to "[RigheDocumento[CodIvaCO][DocumentoCorpoProgettiMG]][CustomerSupplierMG],CompanyDocumentMasterDataMG}" and must be URL-encoded to add it as the value of the dlevel parameter.
Then, you execute the GET call for the document, whose numreg corresponds to 202500000024, and also set the parameter dlevel=%5BRigheDocumento%7BCodIvaCO%2COfficeCO%7D%5BDocumentoCorpoProgettiMG%5D%5D%7BCustomerSupplierMG%2C%20CompanyDocumentMasterDataMG%7D in the call: In this way, the response will only include the values of the entities described in the example.
The DlevelKey service is also available, which allows you to obtain a list of all predefined serializations to use in the dlevelkey property, present in all standard GET calls of the DTOname indicated as a parameter in the call.
For example, given the 'DTO name' CustomerSupplierCODTO, through the DlevelKey service, if you execute the following call::
GET {{webapi_base_url}}/api/v1/{{scope}}/FW/DlevelEntityName/CustomerSupplierCODTO?company={{defaultCompany}}
and the response will include some information, including the 'dlevelkey' parameter.:
[
    {
        "entityDTOName": "CustomerSupplierCODTO",
        "dLevelKeyName": "DL_CustomerSupplierCO_GeneralMasterDataCO",
        "deserializationLevel": "{GeneralMasterDataCO}"
    },
    {
        "entityDTOName": "CustomerSupplierCODTO",
        "dLevelKeyName": "DL_GLEntryFI_AnaGen",
        "deserializationLevel": "{GeneralMasterDataCO}"
    },
    {
        "entityDTOName": "CustomerSupplierCODTO",
        "dLevelKeyName": "DL_IntrastatDataHeaderIN_AnaGen",
        "deserializationLevel": "{GeneralMasterDataCO}"
    }
]
At this point, for example, you execute a GET call for CustomerSupplierCO, with idclifor=5, and also set the dlevelkey parameter to DL_CustomerSupplierCO_GeneralMasterDataCO:
GET {{webapi_base_url}}/api/v1/{{scope}}/CO/CustomerSupplierCO/5?company={{defaultCompany}}
In this case, the response will display the properties of the root 'CustomerSupplier' and the entity {GeneralMasterDataCO} as shown in the JSON below:
{
    "gmdUpdateAdditionalParams": null,
    "clifor": 2.0,
    "codAbiCg12": null,
    "codCabCg13": null,
    "codiceCg28": null,
    "contoCg24": null,
    "contorCg24": null,
    "contratto": null,
    "datavaliva": null,
    "dittaCg18": 1000.0,
    "flgArt62": 0,
    "flgAttivo": 1.0,
    "flgCointestati": 0.0,
    "flgIntercompany": 0.0,
    "ggscadfix": null,
    "gruppoCg10": 80.0,
    "guid": "a4630426-554a-4c95-be8b-4bb9bf52a0d2",
    "idclifor": 5,
    "idmediaCg99": null,
    "indElenchimov3000": 99,
    "intermedioCg40": null,
    "lastchange": "2024-12-04T11:40:36.383",
    "progREf08": null,
    "tipocf": 1.0,
    "idExtendedAttributeEntity": 3,
    "idExtendedAttributeSubEntity": 4,
    "generalMasterDataCO": {
        "alias": null,
        "auidAu04": null,
        "cap": "20121     ",
        "capcor": null,
        "capfisc": "20121     ",
        "cellnum": null,
        "citta": "MILANO",
        "cittacor": null,
        "cittafisc": "MILANO",
        "codfiscale": "00000452151",
        "codice": 4,
        "codiceCg07": 86.0,
        "codiceCg15": null,
        "codiceCgc0": null,
        "codicecorCg07": null,
        "codiceident": null,
        "codicesfed": null,
        "codrichiamo": null,
        "cognome": null,
        "comfisCg01": "F205",
        "comnascita": null,
        "comnascitaCg01": null,
        "datanascita": null,
        "datavalid": null,
        "dtfinepec": null,
        "dtiniziopec": null,
        "faxnum": null,
        "flgAnagval": 1.0,
        "flgFattpa": 0,
        "flgNoblacklist": 0.0,
        "flgOmonimo": 0.0,
        "flgPrsfis": 0.0,
        "idmediaCg99": null,
        "indemail": null,
        "indFiscale": "Contrada Fattoria di Greg 1",
        "indFiscaleEX": null,
        "indirCor": null,
        "indirCorEX": null,
        "indirizzo": "Contrada Fattoria di Greg 1",
        "indirizzoEX": null,
        "indsoggrit": 0.0,
        "indweb": null,
        "lastchange": "2024-12-04T11:40:36.357",
        "nome": null,
        "partitaIVA": "00000452151",
        "partiva": "00000452151",
        "partivaEst": null,
        "prov": "MI",
        "provcor": null,
        "provfisc": "MI",
        "provnascita": null,
        "ragSoAnag": "Greg",
        "ragsoanagex": null,
        "ragsocor": null,
        "ragsocorex": null,
        "ragsofisc": "Greg",
        "ragsofiscex": null,
        "rapazestCg16": null,
        "sesso": 0.0,
        "statofed": null,
        "statofedfisc": null,
        "statofiscCg07": 86.0,
        "statonascitaCg07": null,
        "tel1num": null,
        "tel2num": null,
        "idExtendedAttributeEntity": 1,
        "idExtendedAttributeSubEntity": 2,
        "extensionData": [],
        "additionalData": {}
    },
    "extensionData": [],
    "additionalData": {}
}
Metadata DTO
It is the service that, given a reference EntityDTO, produces a list containing the mapping of the DTO. To analyze the structure of the DTO, the following tools are provided:
- GET Service - FW/MetadataDTO/EntityDTOname
A new GET service has been introduced in the IntegrationInfrastructure module for the MetadataDTO resource. This service requires an EntityDtoName parameter and allows you to view the structure of the object, including all its properties and internal and external relationships.
In the response, all relationships of the DTO entity are displayed as follows:
-
Internal relationships of the root or parent entity (which belong to the starting entity and are stored by the CRUD in the same transaction)
-
External relationships of the entity (used for simple decoding of data present in other entities)
For example, if you want to view the structure of DocumentoTestataMGDTO, you need to execute the following call:
GET {{webapi_base_url}}/api/v1/{{scope}}/FW/MetadataDTO/CustomerSupplierCODTO?withdescriptions=true
The service returns the structure of the EntityDTOName in JSON format. Below is just a part of the JSON response:
{
    "name": "Documento",
    "type": "DocumentoTestataMGDTO",
    "entityName": "DocumentoTestataMG",
    "properties": [
        {
            "propertyName": "bancaCg12",
            "propertyType": "Decimal",
            "isKey": false,
            "mandatory": false,
            "entityPropertyName": "BancaCg12",
            "entityPropertyType": "System.Decimal",
            "rangeValue": null,
            "description": null,
            "shortDescription": null,
            "maxLength": 5,
            "scale": 0
        },
        {
            "propertyName": "cambio",
            "propertyType": "Decimal",
            "isKey": false,
            "mandatory": false,
            "entityPropertyName": "Cambio",
            "entityPropertyType": "System.Decimal",
            "rangeValue": null,
            "description": null,
            "shortDescription": null,
            "maxLength": 12,
            "scale": 6
        },
        {
            "propertyName": "cauprestCg15",
            "propertyType": "String",
            "isKey": false,
            "mandatory": false,
            "entityPropertyName": "CauprestCg15",
            "entityPropertyType": "System.String",
            "rangeValue": null,
            "description": null,
            "shortDescription": null,
            "maxLength": 4,
            "scale": null
        },
        {
            "propertyName": "causmagMg51",
            "propertyType": "Decimal",
            "isKey": false,
            "mandatory": false,
            "entityPropertyName": "CausmagMg51",
            "entityPropertyType": "System.Decimal",
            "rangeValue": null,
            "description": null,
            "shortDescription": null,
            "maxLength": 4,
            "scale": 0
        },
    ]
}
In the response, all properties that make up 'DocumentoTestataMGDTO' are listed, as well as all the relationships linked to 'DocumentoTestataMGDTO'. As an example, the following relationName is provided: "righe" :
            "relationName": "righe",
            "relationType": "DocumentoRigaMGDTO[]",
            "entityRelationName": "RigheDocumento",
            "entityRelationType": "DocumentoCorpoMG",
            "multiplicity": "1:*",
            "isExternal": false,
            "meta": {
                "name": "",
                "type": "DocumentoRigaMGDTO",
                "entityName": "DocumentoCorpoMG",
                "properties": [
                    {
                        "propertyName": "alivacompCg28",
                        "propertyType": "String",
                        "isKey": false,
                        "mandatory": false,
                        "entityPropertyName": "AlivacompCg28",
                        "entityPropertyType": "System.String",
                        "rangeValue": null,
                        "description": null,
                        "shortDescription": null,
                        "maxLength": 4,
                        "scale": null
                    },
    ]
}
In this case, you can execute a new GET call on DocumentoRigaMGDTO to view all the properties and relationships for DocumentoRigaMGDTO, and so on.
Additionally, it is also possible to use some additional parameters: the parameter withdescriptions=true which is used to display descriptions in the properties, and the header Accept=application/xml to get the result in XML format.
- Lookup Service - FW/lookup/MetadataDTOView
A new service has been introduced that allows you to see, via lookup, ONLY if the properties are exposed on the DTO (only rows with PropertyDTOName NOT NULL are displayed).
You need to execute the following call:
POST {{webapi_base_url}}/api/v1/{{scope}}/FW/lookup/MetadataDTOView?metadata=true&company={{defaultCompany}}&_op=search
With this lookup, it is possible to perform selections, for example by using the table name or the column name, to retrieve the name of the linked entity.
Starting from 'EntityName' considered in the previous example 'DocumentoTestataMG', you can execute the POST call with the following body:
{
  "filters": {
    "items": [
      {
        "operator": 0,
        "comparer": 0,
        "propertyName": "EntityName",
        "value": "DocumentoTestataMG"
      }
    ],
    "orderingProperties": {
			"EntityName": 0
		}

  },
  "pageSize": 0,
  "pageNumber": 0
}
and in the response, the exposed properties for the examined DTO will be listed.
Alternatively, you can perform a selection starting from the table name. For example, by specifying TableName=CG44_CLIFOR, as shown below:
{
  "filters": {
    "items": [
      {
        "operator": 0,
        "comparer": 0,
        "propertyName": "TableName",
        "value": "CG44_CLIFOR"
      }
    ],
    "orderingProperties": {
			"EntityName": 0
		}

  },
  "pageSize": 0,
  "pageNumber": 0
}
In the response, all exposed properties will be listed. Below is just a part of the JSON response as an example:
{
    "name": "MetadataDTOView",
    "resources": [],
    "pageNumber": 0,
    "pageSize": 77,
    "data": [
        [
            "CustomerSupplierCO",
            "CustomerSupplierCODTO",
            "Property",
            null,
            null,
            "Tipocf",
            "Tipocf",
            "Tipo Cliente / Fornitore",
            null,
            "CG44_CLIFOR",
            "CG44_TIPOCF",
            "decimal",
            1,
            true,
            null,
            "0= Cliente - 1= Fornitore",
            false
        ],
    ],
}
Alternatively, it is also possible to perform a further selection using the column name, by specifying FieldName=CG44_TIPOCF:
{
  "filters": {
    "items": [
      {
        "operator": 0,
        "comparer": 0,
        "propertyName": "FieldName",
        "value": "CG44_TIPOCF"
      }
    ],
    "orderingProperties": {
			"EntityName": 0
		}

  },
  "pageSize": 0,
  "pageNumber": 0
}
In the response, all exposed properties where the aforementioned FieldName is used will be listed:
{
    "name": "MetadataDTOView",
    "resources": [],
    "pageNumber": 0,
    "pageSize": 4,
    "data": [
        [
            "CustomerSupplierCO",
            "CustomerSupplierCODTO",
            "Property",
            null,
            null,
            "Tipocf",
            "Tipocf",
            "Tipo Cliente / Fornitore",
            null,
            "CG44_CLIFOR",
            "CG44_TIPOCF",
            "decimal",
            1,
            true,
            null,
            "0= Cliente - 1= Fornitore",
            false
        ],
        [
            "CustomerSupplierFI",
            "CustomerSupplierFIDTO",
            "Property",
            null,
            null,
            "Tipocf",
            "Tipocf",
            "Tipo Cliente / Fornitore",
            null,
            "CG44_CLIFOR",
            "CG44_TIPOCF",
            "decimal",
            1,
            true,
            null,
            "",
            false
        ],
    ]
}
- Query Descriptor on FW/Lookup service
In the list of available lookups, which can be called using the FWK Get service "FW/Lookup", the mandatory parameters have been defined in the SearchDTO.
For example: the FW/Lookup service returns the Lookup of the ProjectWH entity
 {
        "lookupName": "ItemProjectWH",
        "description": "ItemProjectWH",
        "href": "/api/v1/{scope}/WH/Lookup/ItemProjectWH",
        "typeQuery": "QueryDescriptor",
        "parametersQueryDescriptor": "ProjectCode"
    }
For this entity the parameters must be reported as follows:
{
"parameters": {
"ProjectCode": "1"
}
}
Upload/Download CLOUD files
The EditPathFW service allows you to manage the upload and download of files on the Cloud. In particular, by calling:
POST {{webapi_base_url}}/api/v1/{{scope}}/FW/EditPathFW/uploadfile?company={{defaultCompany}}&user=admin
it is possible to upload the file specified in the body which must be of type form-data, in which the following Key values with their respective Values must be specified:
- file (type: file) and Value: //indicate the name of the file you want to upload to the cloud
- fixedPathType (type: Text) and Value: UseFileTemp
- relativePath (type: Text) with Value: import
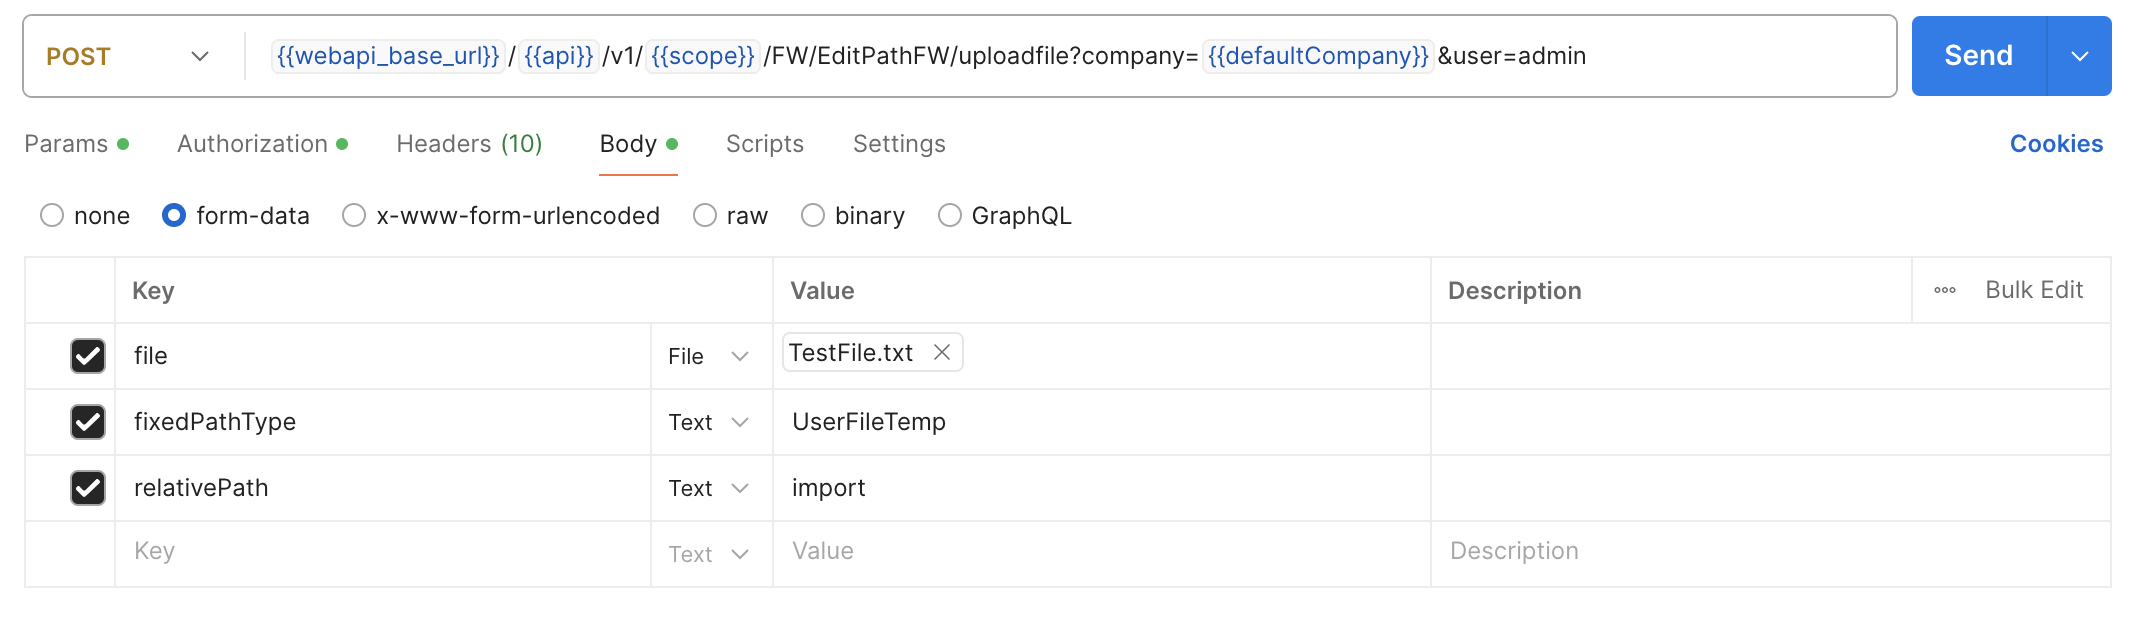
By calling:
POST {{webapi_base_url}}/api/v1/{{scope}}/FW/EditPathFW/getfilelist?company={{defaultCompany}}&user=admin
it is possible to obtain the list of files uploaded to the cloud
{
    "files": [
        "nomefile.xxx"
    ]
}
It is also possible to download the file, previously uploaded to the cloud, with the following call:
POST {{webapi_base_url}}/api/v1/{{scope}}/FW/EditPathFW/getfile?company={{defaultCompany}}&user=admin
In the body with the parameters "asAttachment" and "deleteAfter" it is possible to specify whether to download the file as an attachment and whether to delete it after downloading it
{
  "asAttachment": false,
  "deleteAfter": false,
  "filename": "TestFile.txt",
  "fixedPathType": "UserFileTemp",
  "relativePath": "import"
}
Finally, it is possible to delete the previously uploaded file on the cloud with the following service:
POST {{webapi_base_url}}/api/v1/{{scope}}/FW/EditPathFW/removefile?company={{defaultCompany}}&user=admim
providing the following information in the body:
{
  "filename": "filename.xxx",
  "fixedPathType": "UserFileTemp",
  "relativePath": "import"
}
Task Exec
A service is introduced that allows the execution of actions defined as "sets" ("insiemi") present in the "Application Scheduling" module (legacy).
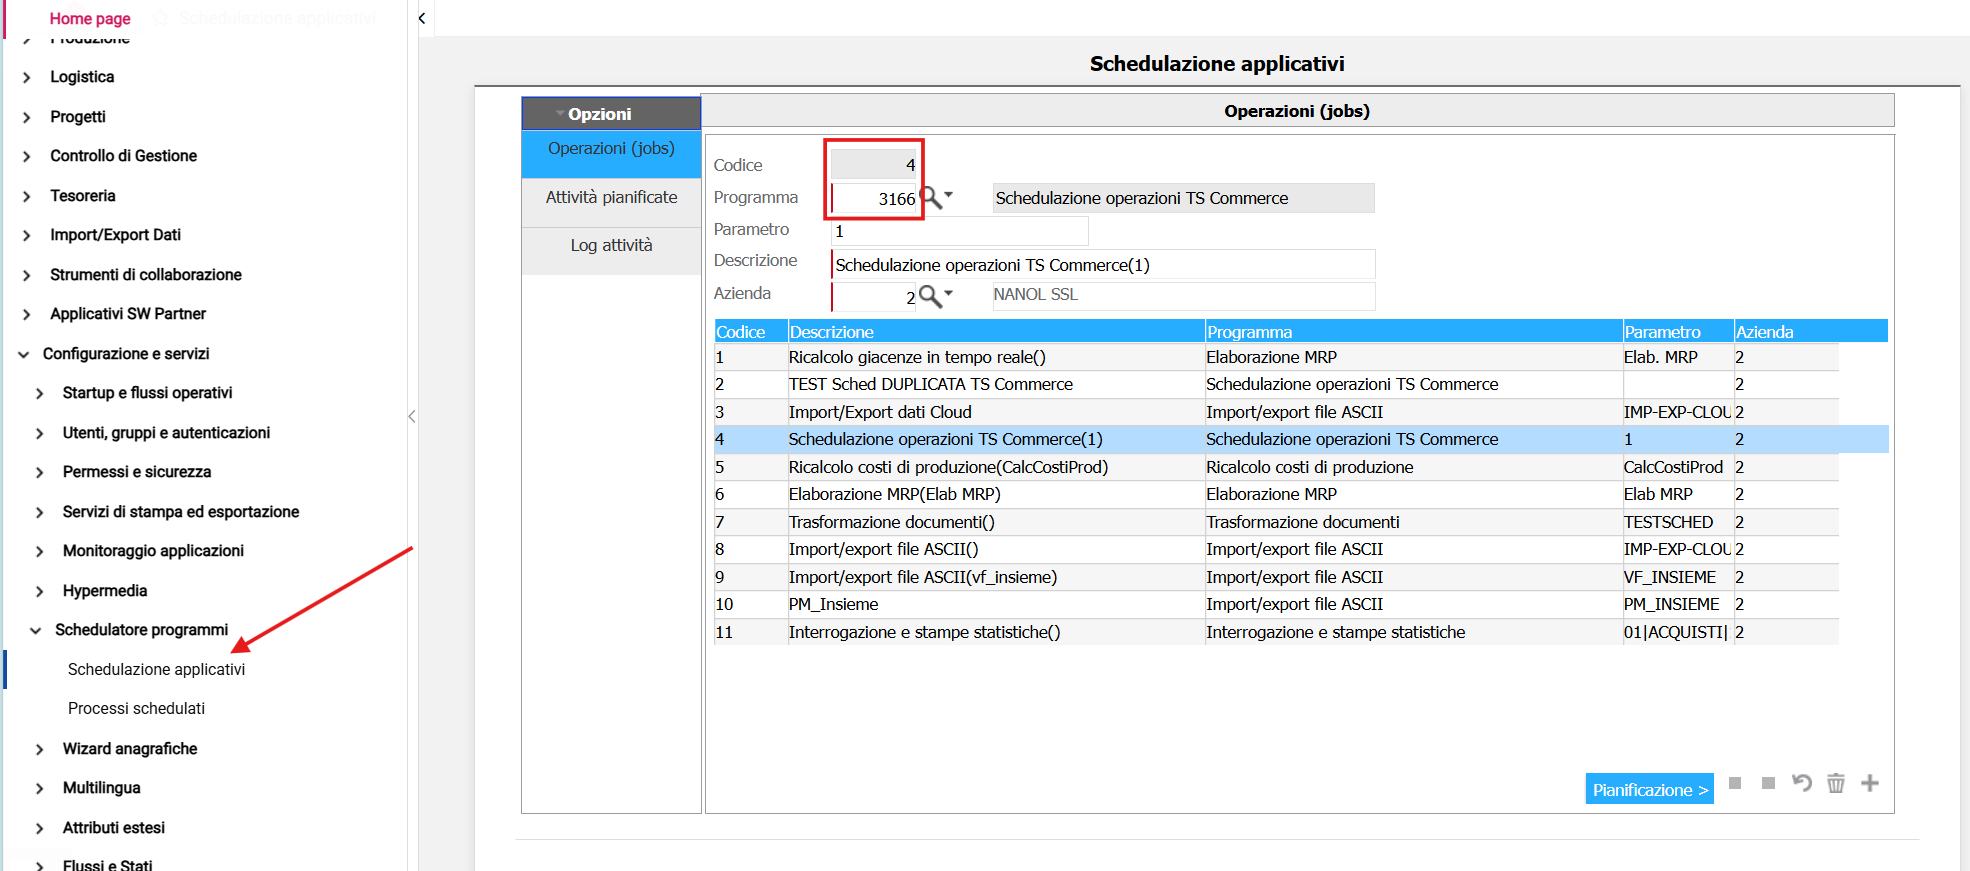
In the example shown in the screenshot, the goal is to create a scheduled task for the job with code 4, which contains the program "3166" ("TS Commerce Operations Scheduling").
Proceeding with the creation of the schedule, the following screen is displayed:
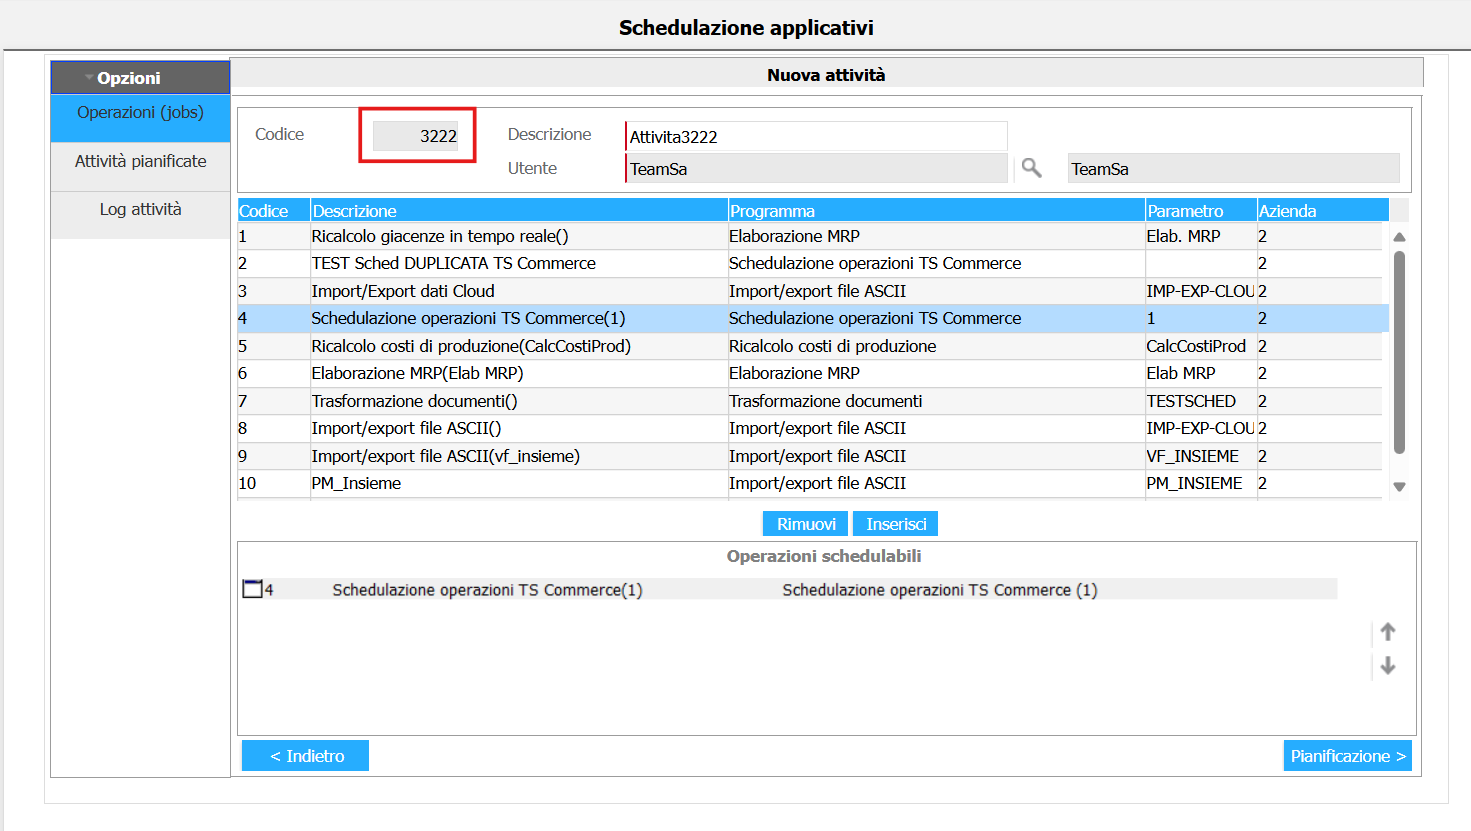
A new task is then created, in this example "Attivita3222", and after specifying the technical user for Windows scheduling, the appropriate button allows you to configure the scheduling frequency:
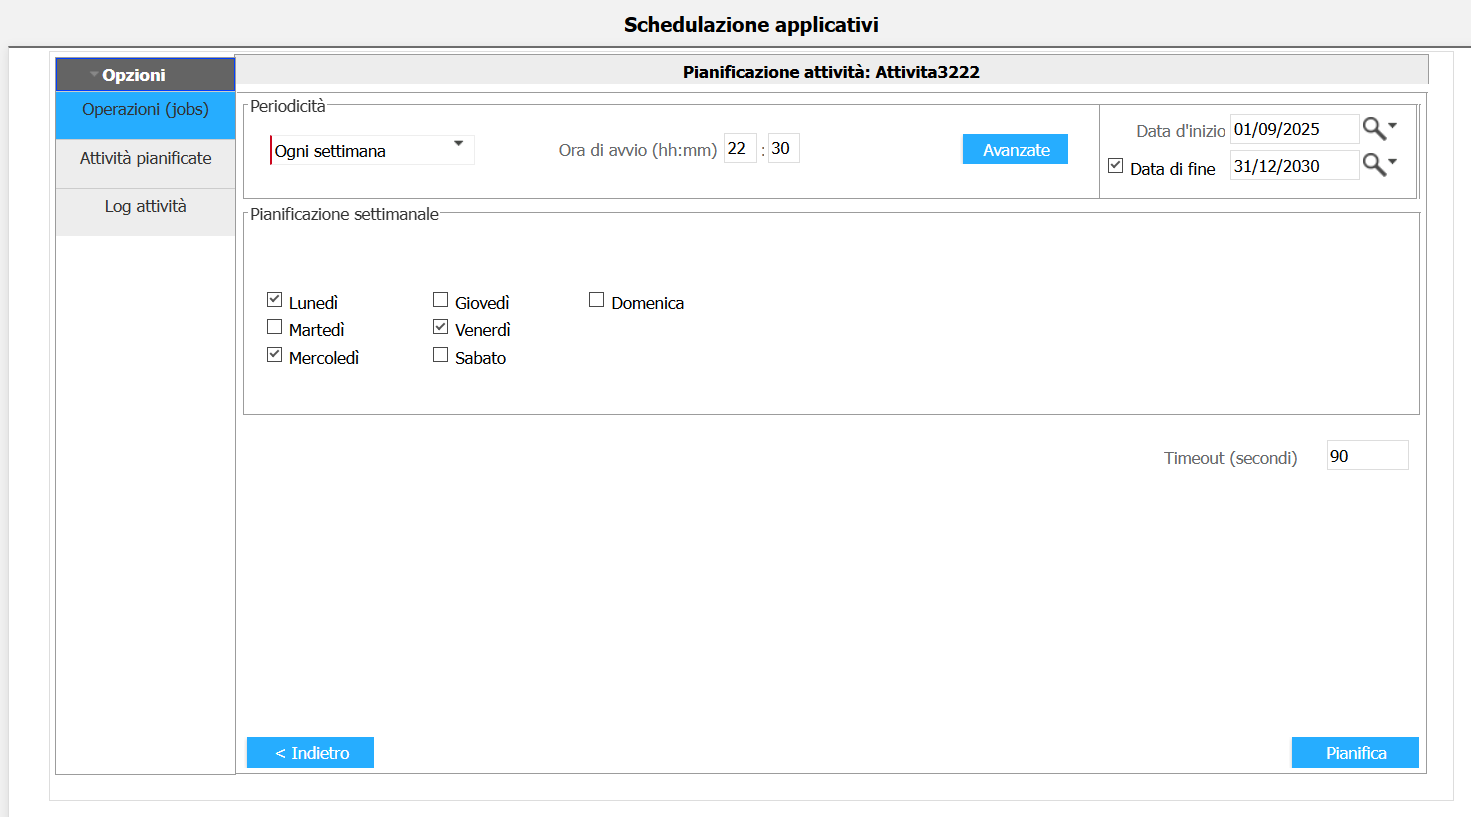
The call is reported below:
POST {{webapi_base_url}}/api/v1/{{scope}}/CO/PgmExec/pgmexecschedulerasync?company={{defaultCompany}}&user=admin'
with the related body:
{
    "idTaskScheduled": "3222",
    "timeoutSeconds": 90,
    "skipIfRunning": true
}
The number indicated in the "idTaskScheduled" field indicates the identifier that represents the "insieme" of scheduled activities. For example, the value 3222 indicates the set of activities related to TS Commerce
License Service
Starting from version 2025002000, the new LicenseFW service has been introduced, replacing the previous and now deprecated FW/Licenze. Currently, the only available action is a GET request to retrieve all information related to a license ID provided as a parameter.:
GET {{webapi_base_url}}/api/v1/{{scope}}/FW/LicenseFW/info/{{idLicenza}}?company={{defaultCompany}}
An example of a response JSON is as follows:
{
    "codLicenza": 1055,
    "numLicenza": "XXYYZZW0",
    "keyAttivazione": "9gTE8Rwo",
    "dataRilascio": "2025-04-14T00:00:00",
    "partitaIvaCliente": "11281128112",
    "partitaIvaRivenditore": "01030103010",
    "licenzaDemo": 0,
    "numeroPostazioni": 2,
    "quantita": 0,
    "isValid": true,
    "extensionData": [],
    "additionalData": {},
    "pluginData": {}
}
AsyncScheduler - Application Scheduling
Introduced in build 2025003000, this endpoint allows scheduling application programs asynchronously. Here is a practical example:
POST {{webapi_base_url}}/api/v2/{{scope}}/fw/asyncschedulerfw?company={{defaultCompany}}
An example of a response JSON is as follows:
{
"additionalInfo": "Esecuzione di pulizia dei dettagli di elaborazione",
  "asyncCatalogId": "CLEAN_PROCESSING_DETAILS",
  "cronExpression": "0 0/30 * * * ?",
  "endUtcDateTime": "2025-09-30T08:00:00.073",
  "isDisabled": false,
  "isWithCompany": true,
  "lastExecutionUtcDateTime": "2025-09-26T08:00:00.073",
  "nextExecutionUtcDateTime": "2025-09-26T08:30:00",
  "serializedParameter": "{ \"daysToKeep\": 30 }",
  "startUtcDateTime": "2023-02-20T15:03:31.29",
  "extensionData": [],
  "additionalData": {},
  "pluginData": {}
}
Invoice
Creazione fattura
La creazione della fattura tramite Smart WebAPI avviene attraverso un endpoint REST che opera in modalità asincrona, utilizzando un approccio batch. Il client invia i dati della fattura sotto forma di payload JSON, strutturato secondo il modello InvoiceDTO Smart.
Il flusso prevede inizialmente l’invio della richiesta di creazione tramite endpoint dedicato, a cui segue una fase di validazione sia formale che semantica dei dati. Una volta verificata la correttezza delle informazioni, il sistema procede con il mapping verso il modello del gestionale target (ad esempio TSE10 o TSE12) e inoltra la richiesta al backend ERP in modalità asincrona.
Al termine dell’invio, viene restituito un identificativo univoco di batch (GUID), che consente al client di tracciare lo stato dell’elaborazione. Il monitoraggio dell’avanzamento e dell’esito del processo avviene tramite un endpoint dedicato di consultazione dello stato del batch.
L'inserimento della fattura avviene con il metodo POST.
{{webapi_base_url}}/api/{{product}}/{{version}}/company/{{defaultCompany}}/document/invoices/batch
con il seguente body:
[
  {
    "model-code": "1",
    "document-date": "2026-05-29",
    "registry-date": "2026-05-29",
    "document-number": 0,
    "document-number-orig": null,
    "customer-supplier": "1",
    "billing-customer-supplier": "1",
    "sectional-code": "00",
    "storage-code": "00",
    "payment-term-code": "301",
    "rows": [
      {
        "row-number": 1,
        "row-type": 0,
        "item-code": "ART_NICK2",
        "item-variant-id": "",
        "description": "Product description NICK2",
        "quantity": 9,
        "price": 13,
        "vat-code": "22"
      },
      {
        "row-number": 3,
        "row-type": 1,
        "item-code": null,
        "item-variant-id": "",
        "description": "Riga descrittiva ...........",
        "quantity": null,
        "price": null,
        "vat-code": null
      }
    ]
  }
]
Lettura fattura
La fase di consultazione della fattura consente di accedere ai documenti già registrati tramite specifici endpoint REST dedicati alla lettura. È possibile recuperare il dettaglio di una singola fattura, identificata dal suo ID, oppure effettuare ricerche su un insieme di documenti, utilizzando criteri di filtro e meccanismi di paginazione.
Queste operazioni avvengono in modalità sincrona e restituiscono al client una rappresentazione completa del documento, comprensiva di intestazione, righe e metadati associati. La fase di lettura non comporta alcuna modifica dello stato della fattura, ma ha l’obiettivo di supportare attività di consultazione, integrazione e utilizzo dei dati da parte di sistemi esterni.
La lettura della fattura avviene con il metodo GET.
{{webapi_base_url}}/api/{{product}}/{{version}}/company/{{defaultCompany}}/document/invoice/{0}
La lettura di una lista di fatture avviene con il metodo GET.
{{webapi_base_url}}/api/{{product}}/{{version}}/company/{{defaultCompany}}/document/invoices
Production
Quantity advancement and time deposits related to one or more interna production phases
To manage the advancement of production quantities and time deposits for a finished product, based on internal production documents, the following services are provided:
- The service to retrieve orders in progress is OrderProdPD
- The service to highlight the details of orders in progress is OrderWorkingCyclePD
- The service to verify the structure of the localized Bill of Materials is OrderBomPD
- The service for the advancement of production quantities and time deposits for internal phases is the WorkOrderService and with the use of the action internalstepprogress.
OrderProdPD Service
This service is used to display all item lines of documents with Document type=Internal production documents and Document subtype=Single-level production orders and with the indicator "delivered status" greater than 2.
A SEARCH type call is executed as indicated below:
POST {{webapi_base_url}}/api/v1/{{scope}}/PD/OrderProdPD/search?company={{defaultCompany}}
And in the Body, you can apply a filter on the "IndDeliveredStatus" property, which corresponds to the "delivered status," to retrieve all fulfillable documents. In this case, the Body will be structured as follows:
{
  "filters": {
    "items": [
      {
        "operator": 0,
        "propertyName": "IndDeliveredStatus",
        "comparer": 11,
        "value": 5
      }
    ]
  },
  "orderingProperties": {
    "DeliveryDate": "0",
    "OrderRegistrationNumber": "0",
    "OrderLine": "0"
  },
  "pagesize": 10,
  "pagenumber": 0
}
The response provides a list of internal production documents and, for each document, the item lines that compose it, retrieving some necessary information for production purposes. For each line, the body is structured as follows:
{
    "company": 2.0,
    "custSuppCode": null,
    "custSuppLegalName": null,
    "deliveryDate": "2025-02-28T00:00:00",
    "documentCode": "INT-ORDLAV",
    "documentNotes": null,
    "documentNumber": 4.0,
    "documentSectional": "00",
    "indDeliveredStatus": 2.0,
    "itemCode": "BICI",
    "itemDescription": "DESCRIZIONE BICI",
    "itemVariantCode": "",
    "lastChangeDate": "2025-04-03T15:57:41.48",
    "manufacturingStartDate": null,
    "orderLine": 1.0,
    "orderRegistrationNumber": "202500000484",
    "priority": null,
    "qtyHandled": null,
    "qtyOrdered": 10.000,
    "qtyPutIn": 0.000,
    "routingCode": "MONT",
    "routingVersion": 0.0,
    "storageCode": "00",
    "unitOfMeasure": "PZ",
},
Let's consider, as an example, "orderRegistrationNumber": "202500000484", for which 10 pieces (as indicated on "qtyOrdered") of the item code BICI need to be produced.
First, the details of the internal production phases are verified using the OrderWorkingCyclePD service.
OrderWorkingCyclePD Service
This service displays the details of the phases of the production order lines.
A SEARCH type call is executed with the following parameters:
POST {{webapi_base_url}}/api/v1/{{scope}}/PD/OrderWorkingCyclePD/search?company={{defaultCompany}}
And in the Body, you can apply a filter on the "StepState" property (which corresponds to 'Phase state'), so the Body is structured as follows:
{
  "filters": {
    "items": [
      {
        "operator": 0,
        "propertyName": "StepState",
        "comparer": 11,
        "value": 3
      }
    ]
  },
  "orderingProperties": {
    "OrderRegistrationNumber": "0",
    "OrderLine": "0",
    "StepProgressive": "0",
    "SubStepProgressive": "0"
},
  "pagesize": 10,
  "pagenumber": 0
}
The response provides various information for each item line of an internal production document, useful for proceeding with the subsequent quantity advancement and time deposits (for example, the "StepCode" which corresponds to the 'processing phase code').
For orderRegistrationNumber="202500000484" (reference example), the response is as follows:
{
        {
            "centerCode": null,
            "company": 2.0,
            "departmentCode": "R1",
            "documentCode": "INT-ORDLAV",
            "documentNumber": 4.0,
            "documentSectional": "00",
            "flagGeneratedOrderWork": 0,
            "machineCode": null,
            "manufacturingEndDate": "2025-02-28T00:00:00",
            "manufacturingStartDate": "2025-02-28T00:00:00",
            "manufacturingTime": 0.00000000,
            "numberPieces": null,
            "orderLine": 1.0,
            "orderRegistrationNumber": "202500000484",
            "qty1": 10.000,
            "qty1Delivered": 0.000,
            "qty1Scrapped": 0.000,
            "qty2": 0.000,
            "qty2Delivered": 0.000,
            "qty2Scrapped": 0.000,
            "qtyReferenceLot": null,
            "queueTime": 0.00000000,
            "setUpTime": 0.00000000,
            "stepCode": 1.0,
            "stepDescription": "PRODUZIONE BASE",
            "stepProgressive": 1.0,
            "stepSequence": 10.0,
            "stepState": 0,
            "subcontractorCode": null,
            "subStepProgressive": 0.0,
            "toolCode": null,
            "toolVariant": null,
            "typeProduction": 0,
            "waitingTime": 0.00000000,
            "extensionData": [],
            "additionalData": {}
        },
}
Using the OrderBomPD service (described below), you can verify the components that make up the item code 'BICI'.
OrderBomPD Service
This service allows you to view the structure of the localized Bill of Materials. A SEARCH type call is executed with the following parameters:
POST {{webapi_base_url}}/api/v1/{{scope}}/PD/OrderBomPD/search?company={{defaultCompany}}
And in the Body, you can define the sorting, for example, by Internal Production Document Registration Number (OrderRegistrationNumber), Internal Line Progression (OrderLine), and Component Sequence (ComponentSequence). The Body is structured as follows:
{
  "orderingProperties": {
    "OrderRegistrationNumber": "0",
    "OrderLine": "0",
    "ComponentSequence": "0"
},
  "pagesize": 10,
  "pagenumber": 0
}
For orderRegistrationNumber="202500000484" (reference example), the response provides the components that make up the finished product 'BICI' for each document line. The response body is structured as follows:
{
        {
            "bomLinkStorageCode": "00",
            "company": 2.0,
            "componentCode": "RUOTA",
            "componentSequence": 10.0,
            "componentVariantCode": "",
            "documentCode": "INT-ORDLAV",
            "documentNumber": 4.0,
            "documentSectional": "00",
            "guid": "47d608d9-55ee-4854-aa38-65e501b6f903",
            "idBom": 16.0,
            "orderLine": 1.0,
            "orderRegistrationNumber": "202500000484",
            "qtyExploded": 20.000,
            "reservationStorageCode": "00",
            "stepCode": 1.0,
            "extensionData": [],
            "additionalData": {}
        },
}
At this point, you can proceed with the production of the item code 'BICI' for the necessary quantities using the WorkOrderServicePD service.
WorkOrderService
If a document contains an item code that is a finished product of a bill of materials, the user has the option to advance the quantities and/or post the times related to internal production or to advance the phases related to external production.
The service includes two actions:
-
internalstepprogress which allows the advancement of quantities and/or the posting of times related to one or more internal phases corresponding to a document line of a work order (ODL);
-
subcontractingstepprogress which allows the advancement of external phases worked by a subcontractor for a production order line or the posting of a subcontracted work order line assigned to a subcontractor.
Progress of Times and Quantities for Internal Production Order
To perform the internalstepprogress action, you need to make the following POST request:
POST {{webapi_base_url}}/api/v1/{{scope}}/PD/WorkOrderService/internalstepprogress?company={{defaultCompany}}
and in the body, you can specify the appropriate parameters (Operation registration date, registration number and order line on which to perform the operations, data of the phase or phases to be advanced, data of the times to be posted, data of the materials to be issued, traceability data for both the item in order and the materials to be issued).
For example, given a work order with orderRegistrationNumber="202500000484" (reference example), it is decided to start production on the registration date of April 4th for a quantity of 2 pieces of the item code 'BICI' and to post the time required to produce it (in our example, 1 hour).
Consequently, the body is structured as follows:
{
  "postingDate": "2025-04-04",
  "orderRegistrationNumber": "202500000484",
  "orderLine": 1,
  "stepData": [
    {
      "stepCode": 1,
      "stepProgressive": 1,
      "qtyToProgress": 2,
      "stepTimesData": [
        {
          "timesPostingDate": "2025-04-04",
          "timeHours": 1
        }
      ]
    }
  ]
}
Note: You must always specify AT LEAST one value between stepCode and StepProgressive (it is not necessary to specify both).
The response includes the list of registration numbers of the generated documents, thus the registration number of the Progress document for the item code BICI and for the quantity indicated in "qtyToProgress" and the registration number of the Production Issue document for the component of the bill of materials, for the item code RUOTE.
{
    "result": true,
    "documentRegistrationNumbers": [
        "202500000542",
        "202500000543"
    ],
    "extensionData": [],
    "additionalData": {}
}
Progress of Subcontracted Work
To perform the subcontractingstepprogress action, you need to make the following POST request:
POST {{webapi_base_url}}/api/v1/{{scope}}/PD/WorkOrderService/subcontractingstepprogress?company={{defaultCompany}}
and in the body, you can specify the appropriate parameters (operation registration date, order type OCL (Subcontracted Work Order) or ODP (Production Order), registration number and order line number on which to perform the operations, subcontractor code, details of the document related to the subcontractor (supplier), data of one or more phases to be posted, data of the materials to be issued, traceability data for both the item in order and the materials to be issued).
For a correct advancement of a subcontracted work order, you must generate the delivery note (ddt) for sending to subcontracted work from the ERP.
For example, given a work order with orderRegistrationNumber="202500000959" (reference example), it is decided to advance the external production phases or to post a subcontracted work order line on the registration date of July 14th for a quantity of 2 pieces of the item code 'PADRE-EST'.
In this case, the body should be structured as follows:
{
  "postingDate": "2025-07-14",
  "orderType": 0,
  "orderRegistrationNumber": "202500000959",
  "orderLine": 1,
  "subContractorCode": 1,
  "subContractorDocument": "ABC123",
  "subContractorDocumentDate": "2025-07-14",
  "documentDate": "2025-07-14",
  "documentSectional": "00",
  "loadingStorage": "00",
  "recipientSubContractorCode": 0,
  "stepData": [
    {
      "stepCode": 101,
      "qtyToProgress": 2,
      "qtyToScrap": 1,
      "stepComponentsData": [
        {
          "stepCode": 101,
          "componentCode": "FIGLIO-EST",
          "componentQty": 6,
        }
      ]
    }
  ]
}
In the body of the request, you define the parameters qtyToProgress and qtyToScrap to specify the production quantity and any scrap quantity. Additionally, you can also define the parameters traceabilityData for the finished product item code and componentsTraceabilityData for the component item code to specify the corresponding batch code.
La response riporta l'elenco dei numeri registrazione dei documenti generati, quindi il numReg delL'ordine conto lavoro passivo per il codice articolo PADRE-EST ed il numReg del documento di Avanzamento Fasi per il componente della distinta ossia FIGLIO-EST:
The response includes the list of registration numbers of the generated documents, thus the registration number of the subcontracted work order for the item code PADRE-EST and the registration number of the Phase Progress document for the component of the bill of materials, for the item code FIGLIO-EST.
{
    "result": true,
    "documentRegistrationNumbers": [
        "202500000960",
        "202500000961"
    ],
    "extensionData": [],
    "additionalData": {}
}
Inserting a Project
The ProjectPD V2 service is a REST endpoint that allows you to insert a new project into the company management system. Here’s a practical example:
{{webapi_base_url}}/api/v2/{{scope}}/PD/ProjectPD?company={{defaultCompany}}
with the following body:
{
    "customerCode": 1,
    "description": "PROGETTO DI PROVA",
    "manufacturingStartDate": "2025-12-15T00:00:00",
    "statusCode": "1",
    "typeCode": "1",
    "code": "PROVA2",
    "companyCode": 2.0,
    "manufacturingEndDate": "2026-12-15T00:00:00",
    "activities": [
        {
            "actualEndDate": null,
            "actualStartDate": null,
            "code": "1",
            "companyCode": 2.0,
            "costCurrencyCode": "EURO",
            "description": "Attività 1",
            "isSocialSecurityTaxSubject": 0,
            "isSupplementaryTaxSubject": 0,
            "isVatReduced": 0.0,
            "isWithholdingTaxSubject": 0,
            "manualEstimatedCost": 0.0,
            "manualEstimatedRevenue": 0.0,
            "projectCode": "PROVA",
            "revenueCurrencyCode": "EURO",
            "vatCode": "22"
        }
    ],
    "nodes": [
        {
            "description": "Nodo 1",
            "manualEstimatedCost": 0.0,
            "statusCode": "APERTO",
            "code": "NODO 1                   ",
            "companyCode": 2.0,
            "costCalculationType": 0,
            "costCurrencyCode": "EURO",
            "projectCode": "PROVA",
            "revenueCalculationType": 0.0,
            "revenueCurrencyCode": "EURO",
            "vatCode": "22  ",
            "extensionData": [],
            "additionalData": {},
            "pluginData": {}
        }
    ]
}
Inserting a Department
The DepartmentPD service is a REST endpoint that allows you to insert a new department into the company management system. Here’s a practical example:
{{webapi_base_url}}/api/v2/{{scope}}/PD/ProjectPD?company={{defaultCompany}}
with the following body:
{
    "companyCode": {{defaultCompany}},
    "code": "TestP",
    "description": "Descrizione Progetto test",
    "shiftCode": 1,
    "statusType": 0,
    "storageCode": "00",
    "worth": 1
}
Add a price list to a new item
The ListinoArticoloLI/addlistinotonewarticolo service is a REST endpoint that allows you to insert a new price list. Here's a practical example:
{{webapi_base_url}}/api/v1/{{scope}}/LI/ListinoArticoloLI/addlistinotonewarticolo?Company={{defaultCompany}}
with the following body:
{
    "codiceArticolo": "00001",
    "prezzo": 123,
    "dataInizioVal": "2026-02-26T16:33:45.281Z",
    "dataFineVal": "2026-02-28T16:33:45.281Z",
    "isVendita": true
}
Search the list price according to reference date
The ListinoArticoloLI/searchlistino service is a REST endpoint that allows you to search the list price according to reference date. Here's a practical example:
{{webapi_base_url}}/api/v1/{{scope}}/LI/ListinoArticoloLI/searchlistino?Company={{defaultCompany}}
with the following body:
{
    "dataRiferimento": "2026-02-25T15:35:38.382Z"
}
Search the list price
The ListinoArticoloLI/search service is a REST endpoint that allows you to search the list price. Here's a practical example:
{{webapi_base_url}}/api/v1/{{scope}}/LI/ListinoArticoloLI/search?Company={{defaultCompany}}
with the following body:
{
    "dataRiferimento": "2026-02-25T15:35:38.382Z",
    "pageSize": 10,
    "pageNumber": 0
}
Inserting a Project Classes A
The ProjectClassAPD service is a REST endpoint that allows you to insert a new project class A into your enterprise management system. Here's a practical example:
{{webapi_base_url}}/api/v1/{{scope}}/PD/ProjectClassAPD?Company={{defaultCompany}}
with the following body:
{
    "code": "TEST_AAA",
    "companyCode": 2.0,
    "description": "Descrizione Classe A",
    "isHierarchic": 1,
    "structureType": 0
}
Inserting a Project Classes B
The ProjectClassBPD service is a REST endpoint that allows you to insert a new project class B into your enterprise management system. Here's a practical example:
{{webapi_base_url}}/api/v1/{{scope}}/PD/ProjectClassBPD?Company={{defaultCompany}}
with the following body:
{
    "code": "TEST_BBB",
    "companyCode": 2.0,
    "description": "Descrizione Classe B",
    "isHierarchic": 1.0,
    "structureType": 0.0,
    "projectClassA": {
        "code": "TEST_AAA",
        "companyCode": 2.0
    }
}
Inserting a Project Classes C
The ProjectClassAPD service is a REST endpoint that allows you to insert a new project class C into your enterprise management system. Here's a practical example:
{{webapi_base_url}}/api/v1/{{scope}}/PD/ProjectClassCPD?Company={{defaultCompany}}
with the following body:
{
    "code": "TEST_CCC",
    "companyCode": 2.0,
    "description": "Descrizione Classe C",
    "structureType": 0.0,
    "projectClassB": {
        "code": "TEST_BBB",
        "companyCode": 2.0
    }
}
Import resource times into a project job
The ProjectService/timesheetprogress service is a REST endpoint that allows you to import resource times into a project/job. Here's a practical example:
{{webapi_base_url}}/api/v1/{{scope}}/PD/ProjectService/timesheetprogress?company={{defaultCompany}}
with the following body:
{
  "timesheetItems": [
    {
      "projectCode": "PROGETTO1",
      "nodeCode": "NODO1",
      "activityCode": "1",
      "employeeCode": "1",
      "referenceDate": "2026-04-23",
      "enteredHours": 3,
      "enteredMinutes": 20,
      "enteredSeconds": 35,
      "timeType": 0,
      "notes": "Test Versamento "
    }
  ]
}

The service modify the times. Here's a practical example:
{
  "timesheetItems": [
    {
      "id": 32,
      "projectCode": "PROGETTO1",
      "nodeCode": "NODO1",
      "activityCode": "1",
      "employeeCode": "1",
      "referenceDate": "2026-04-23",
      "enteredHours": 4,
      "enteredMinutes": 30,
      "enteredSeconds": 10,
      "timeType": 0,
      "notes": "Test Versamento "
    }
  ]
}

The service delete the times if the fields enteredHours, enteredMinutes and enteredSeconds are set to zero. Here's a practical example:
{
  "timesheetItems": [
    {
      "id": 32,
      "projectCode": "PROGETTO1",
      "nodeCode": "NODO1",
      "activityCode": "1",
      "employeeCode": "1",
      "referenceDate": "2026-04-23",
      "enteredHours": 0,
      "enteredMinutes": 0,
      "enteredSeconds": 0,
      "timeType": 0,
      "notes": "Test Versamento "
    }
  ]
}
Unsupported managements
Below is a list of particular managements currently not supported when inserting a document via WebAPI:
- Risk control
- Explosion of multiple item cards